ExecutivePro User Guide
Introduction
Welcome to ExecutivePro, an all-in-one Human Resource (HR) solution for managing employee information. Are you a growing startup looking for its first HR software? Are you tired of grappling with time-consuming tasks? Do you want to streamline your HR processes and boost your productivity? Look no further! ExecutivePro is here to make it happen.
ExecutivePro is a desktop app for HR managers that you can use to keep track of your employees’ personal information, filter through employee data, manage their leaves, and more! ExecutivePro features an easy-to-use Command Line Interface (CLI), which means it’s designed to save you time by letting you do everything from just your keyboard. With ExecutivePro, you can optimise your HR workflow and free yourself from the drudgery of mundane tasks.
The purpose of this guide is to walk you through the comprehensive features of ExecutivePro and to help you troubleshoot any problems you may face while using ExecutivePro. Read on to learn more and experience the game-changing benefits that ExecutivePro can bring to your work!
Using this Guide
Do check out Quick Start if this is your first time using ExecutivePro.
Refer to the Table of Contents to easily navigate around different sections of the User Guide.
If you have already set up ExecutivePro, feel free to navigate to Features to learn how to use the features we offer.
Refer to the Command Summary if you just need some quick reminders of the command format.
If you encounter a term that you are unsure about, the Glossary is where you want to go.
Symbols and Syntax
Here are the symbols that you will see while reading this user guide:
| Symbol | Meaning |
|---|---|
code |
Text relevant to commands or a filename. |
[code] |
The brackets around the code indicate that the field is optional. |
| Tips for ExecutivePro users. | |
| Be wary and proceed with caution. | |
... |
Items with ... after them can either be omitted or used one or more times.Example: [t/TAG]… can be used as t/friend, t/friend t/family or omitted completely. |
Table of Contents
- Introduction
- Using this Guide
- Table of Contents
- Quick start
- The User Interface
- Employee Profiles
- Features
- FAQ
- Planned Enhancements
- Field Formats
- Command Summary
- Glossary
Quick start
Follow these steps if this is your first time using ExecutivePro:
- Ensure you have Java
11or above installed in your Computer.- If you have already installed Java, check that you have Java version
11.- If you are using Windows, open up command prompt and type
java -versionand enter. - If you are using Mac, open up terminal and type
java -versionand enter.
- If you are using Windows, open up command prompt and type
- If you do not have Java
11:
- If you have already installed Java, check that you have Java version
- Download the latest
ExecutivePro.jarfrom here. - Create a folder on your computer that you want to use as the main folder for ExecutivePro and move
ExecutivePro.jarto that folder. For example, we create atestfolder on our Desktop.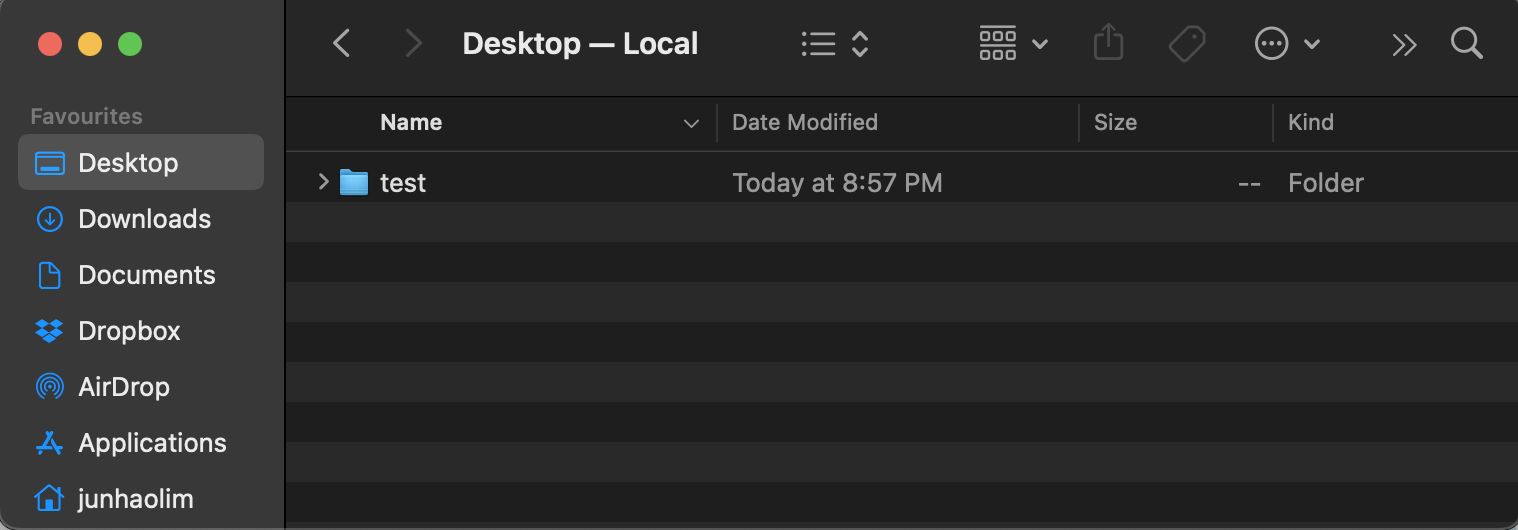
test folderNext, we place the
ExecutivePro.jarfile in thetestfolder as shown below.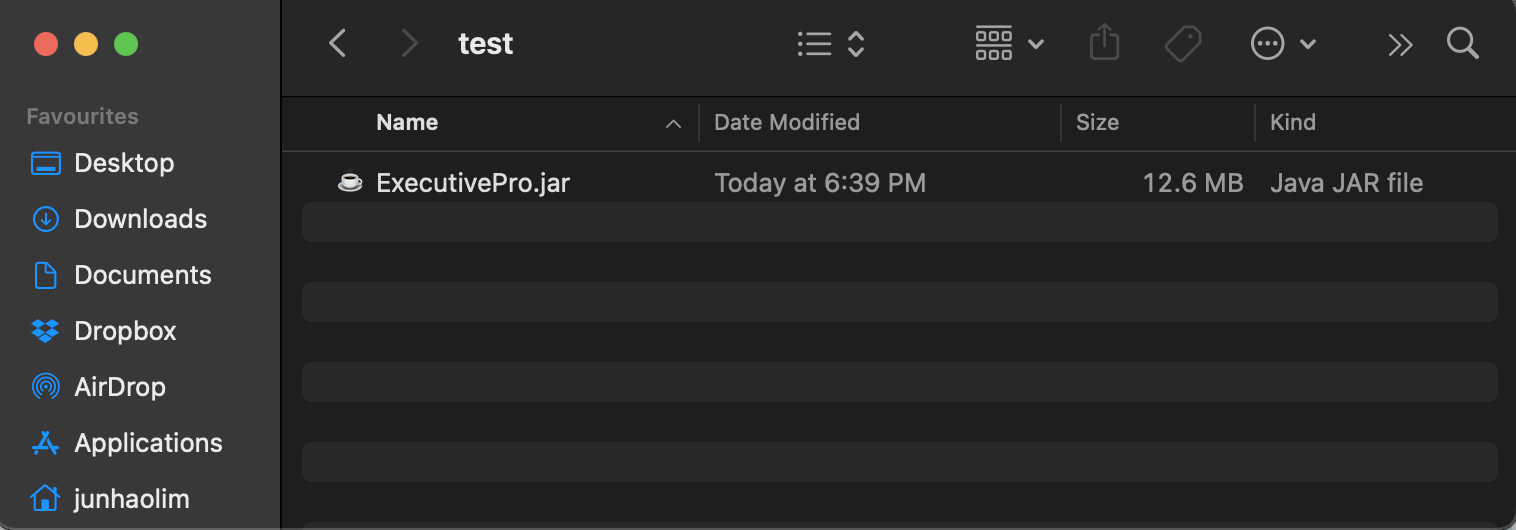
ExecutivePro jar file - Now you are ready to use ExecutivePro, refer to the section Starting ExecutivePro below for more details.
Starting ExecutivePro
![]() Note:
To get started with ExecutivePro, you will need to run the application using your terminal or command prompt. Follow the steps below:
Note:
To get started with ExecutivePro, you will need to run the application using your terminal or command prompt. Follow the steps below:
Step 1 (Opening Terminal or Command Prompt) :
On Windows, press Windows + R, type cmd, and hit Enter to open the Command Prompt. On macOS, press Cmd + Space, type terminal, and hit Enter to open Terminal.
Your Command Prompt/Terminal should show up like this:
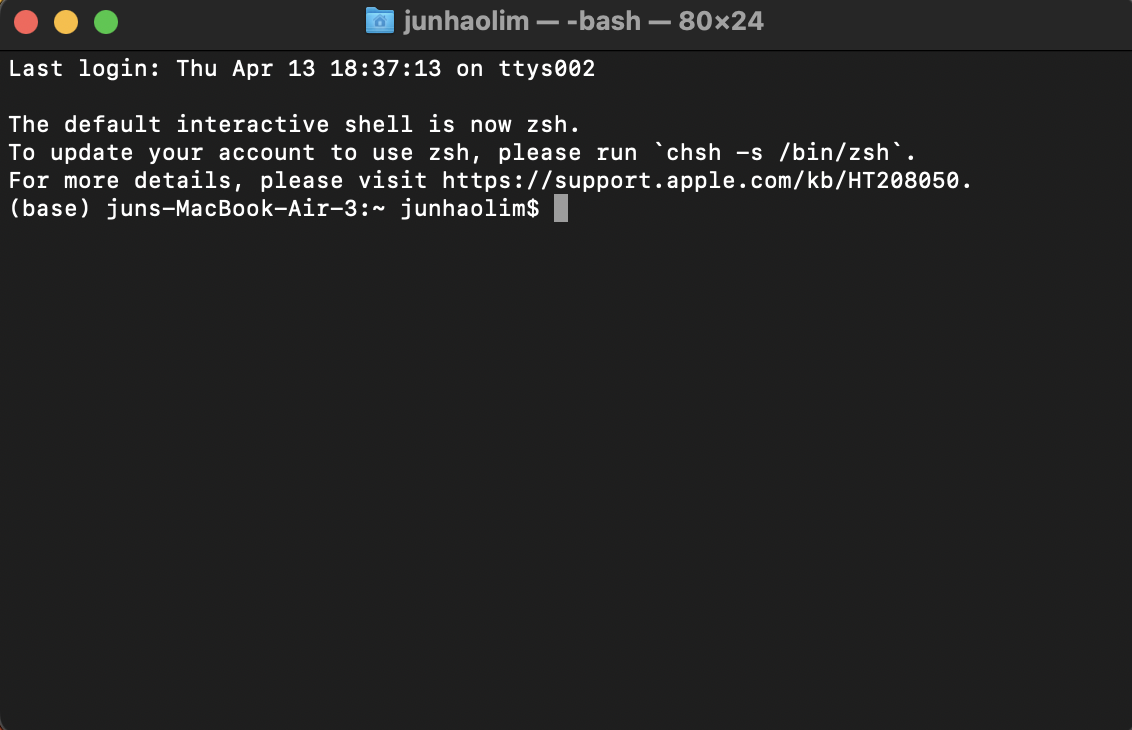
Terminal Page
Step 2 (Navigating to the Jar File Location) :
Use the cd command to navigate to the folder where the ExecutivePro.jar file is located in.
This is the folder you placed your jar file in, as done in point 3 of Quick start section.
For example, if the file is located in the test folder on your Desktop, you can type cd Desktop and hit Enter, followed by
cd testand Enter to reach the test folder, just like the image below.
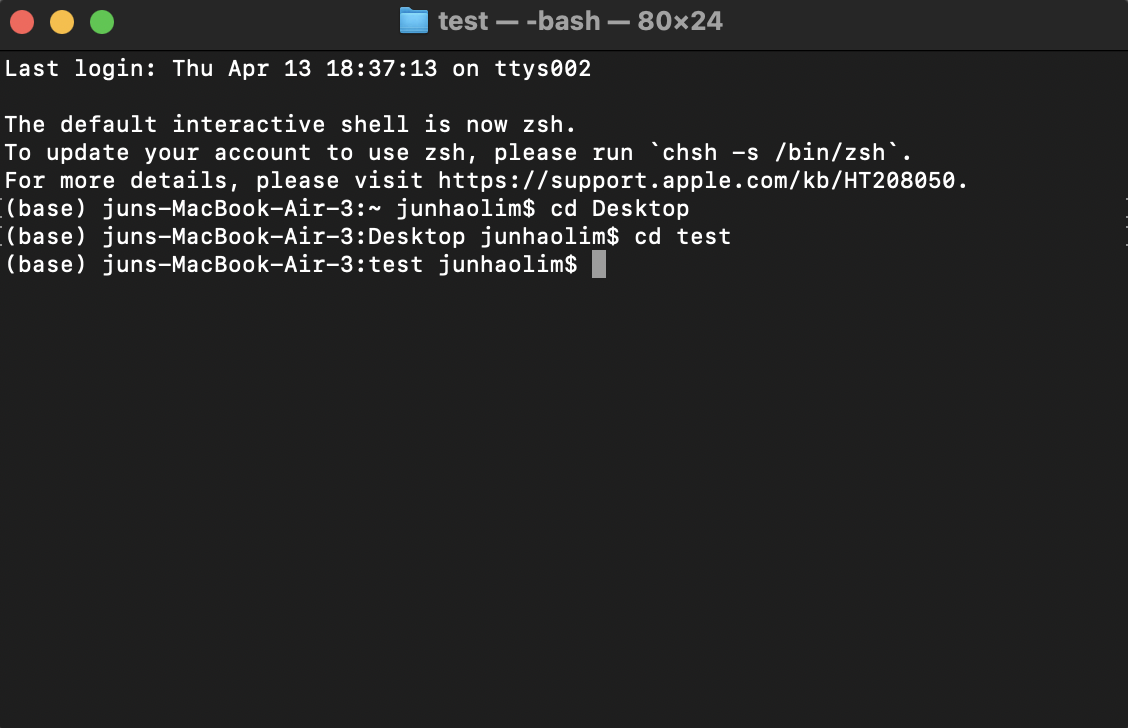
Changing Directory
Step 3 (Running the Application) :
Once you are in the correct directory, type the following command,java -jar ExecutivePro.jar, in your terminal and hit Enter:
A window like below should appear in seconds. Note how the app contains some sample data.
Starting Page
A data folder should appear in the same folder as the ExecutivePro.jar file after the application is run successfully.
If the data folder is missing, simply create a folder named data in the same location as the ExecutivePro.jar file.
Congratulations, ExecutivePro is now running, you can refer to the Features section below to learn all about the exciting features that ExecutivePro offer.
The User Interface
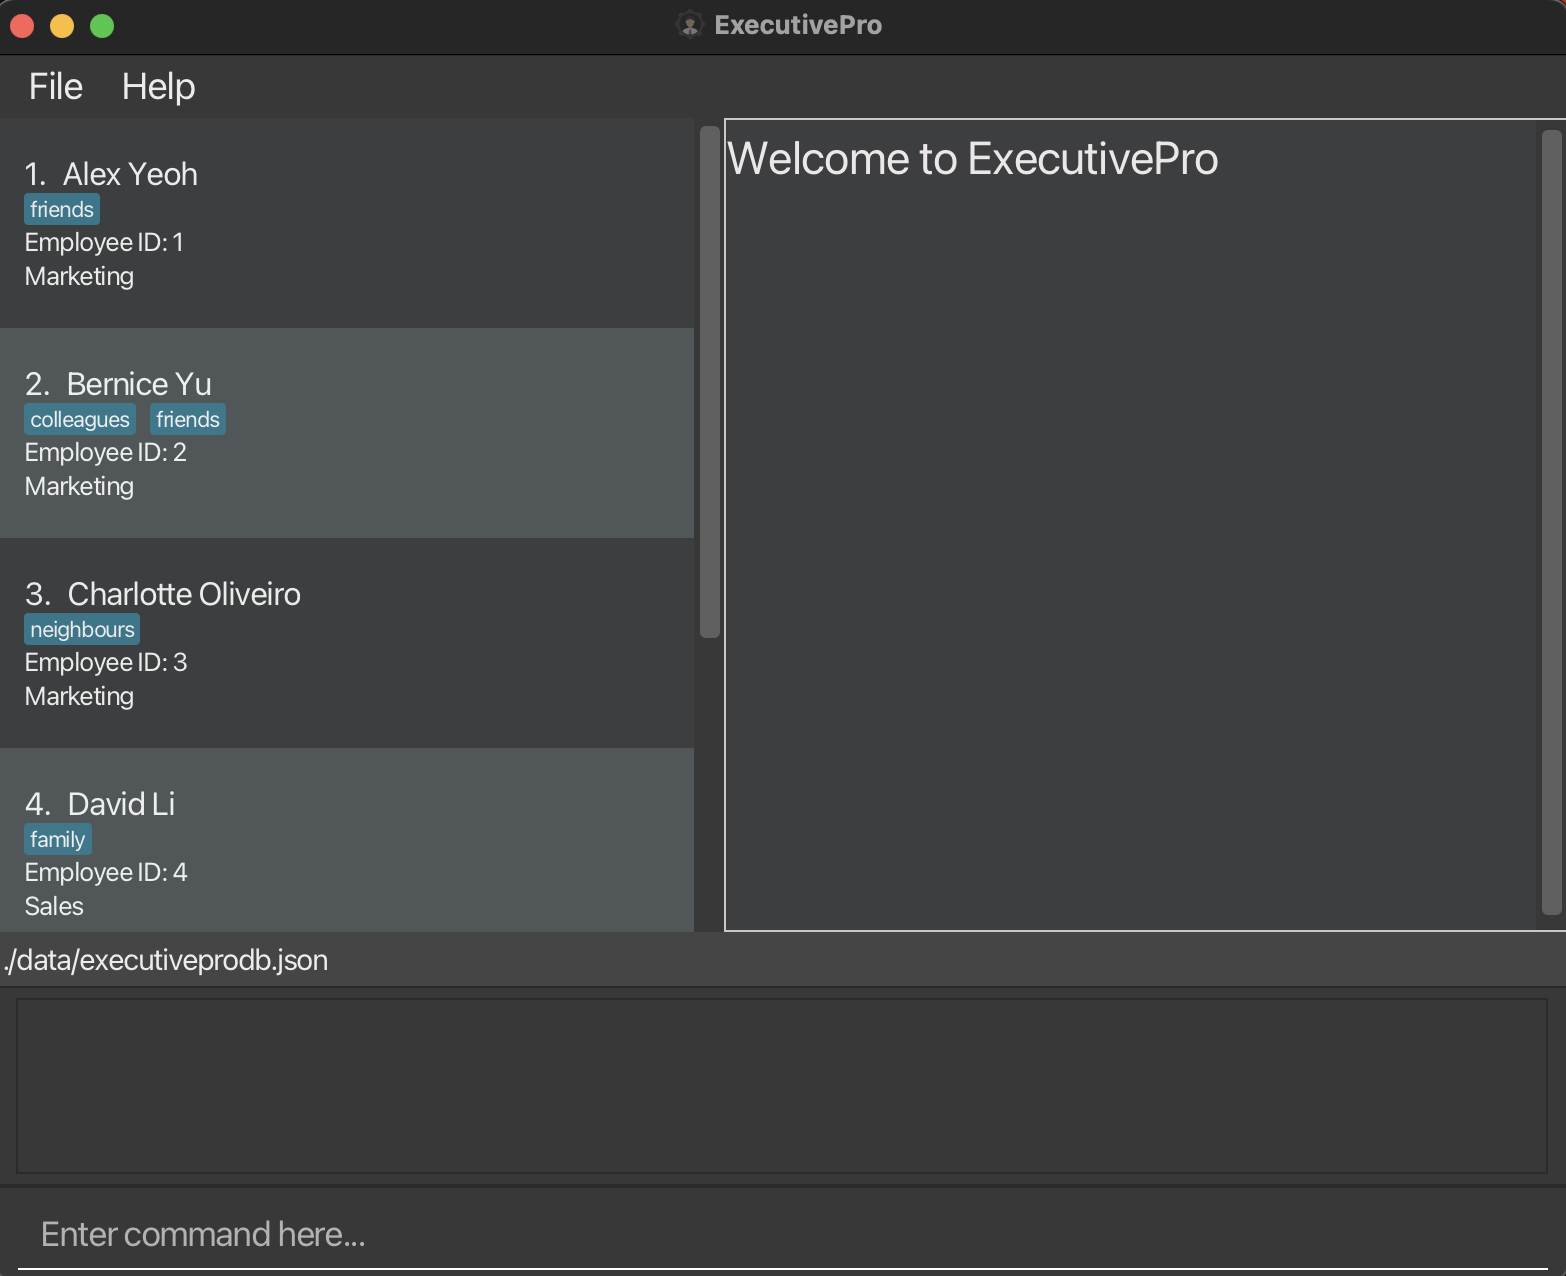
This section explains the different components of the ExecutivePro User Interface.
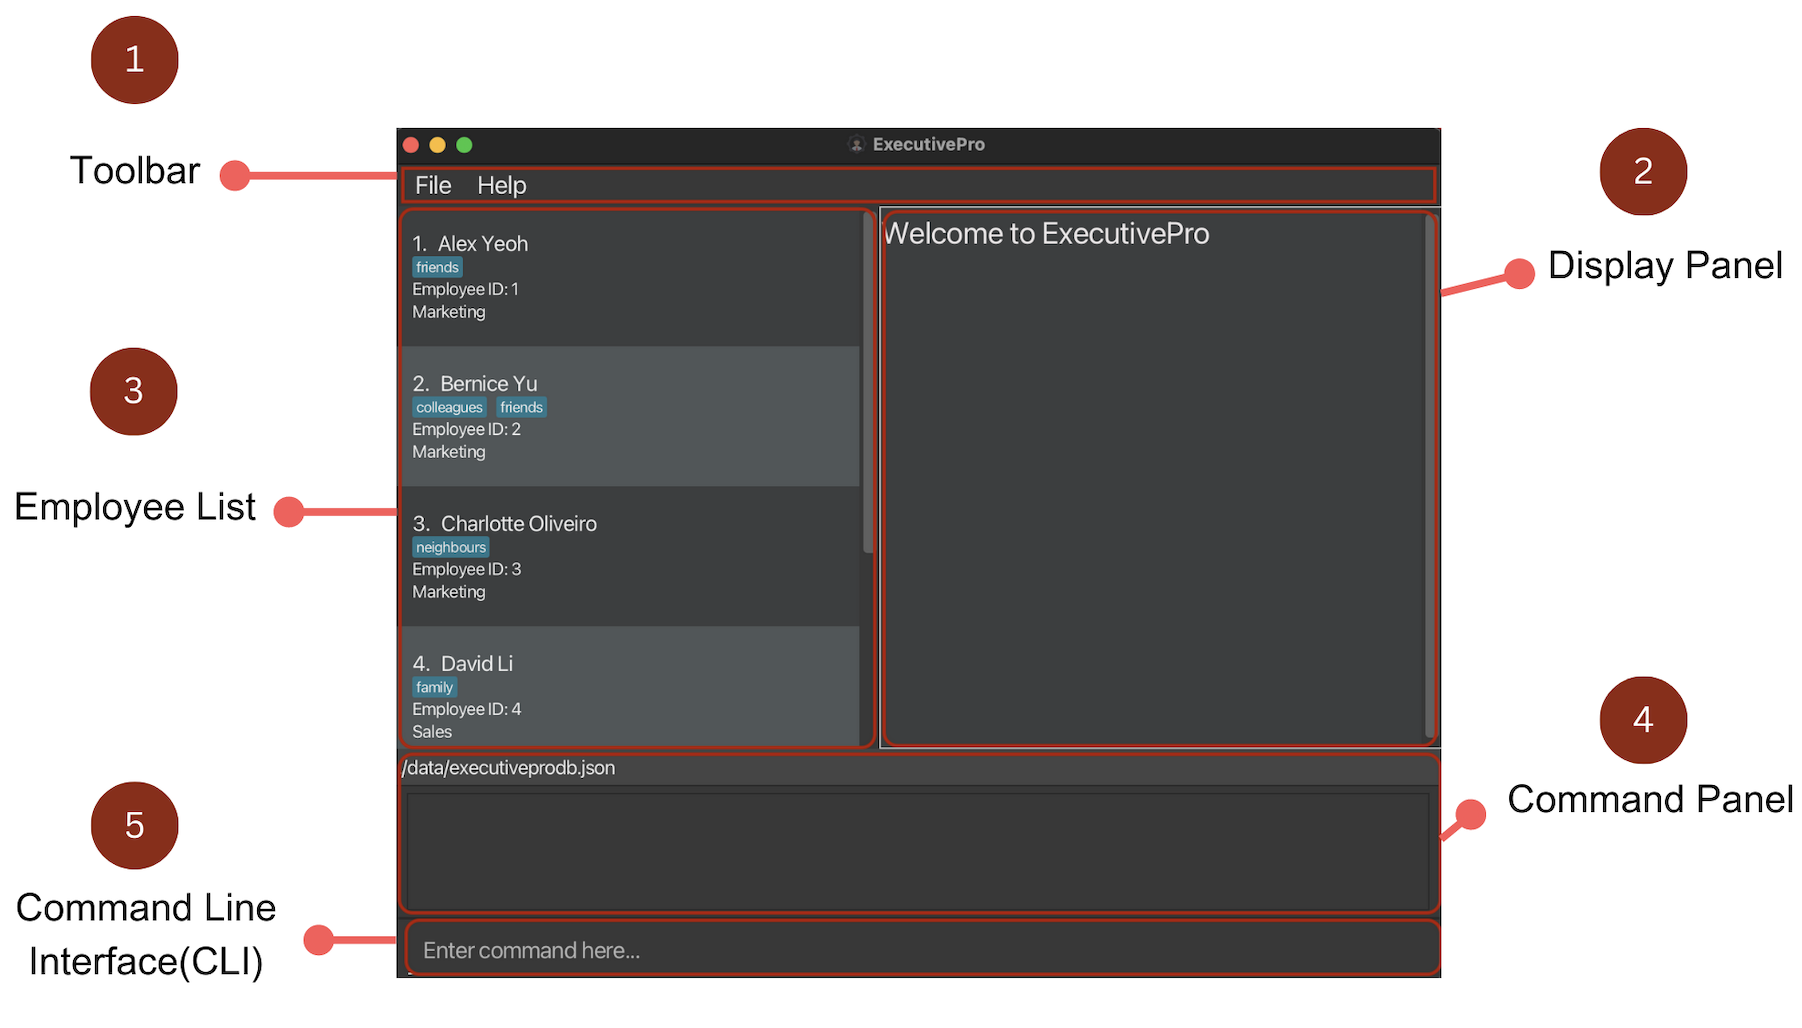
ExecutivePro User Interface
Main components of the ExecutivePro User Interface:
| No. | Component | Description |
|---|---|---|
| 1 | Toolbar | “File” button to exit program manually. “Help” button to display the Help Window. |
| 2 | Display Panel | Displays the full information of an employee, including personal details, department, payroll and leave information. |
| 3 | Employee List | Displays the entire list of employees, along with their basic information (Name, Employee Id, Department and tags). |
| 4 | Command Panel | Displays the outcome of the entered command after execution, including error and success messages. |
| 5 | Command Line Interface (CLI) | This is where you enter the commands. |
1. Toolbar

Toolbar
This toolbar can be used to:
- Exit ExecutivePro through the File button
- Access the Help Window through the Help button
2. Display Panel
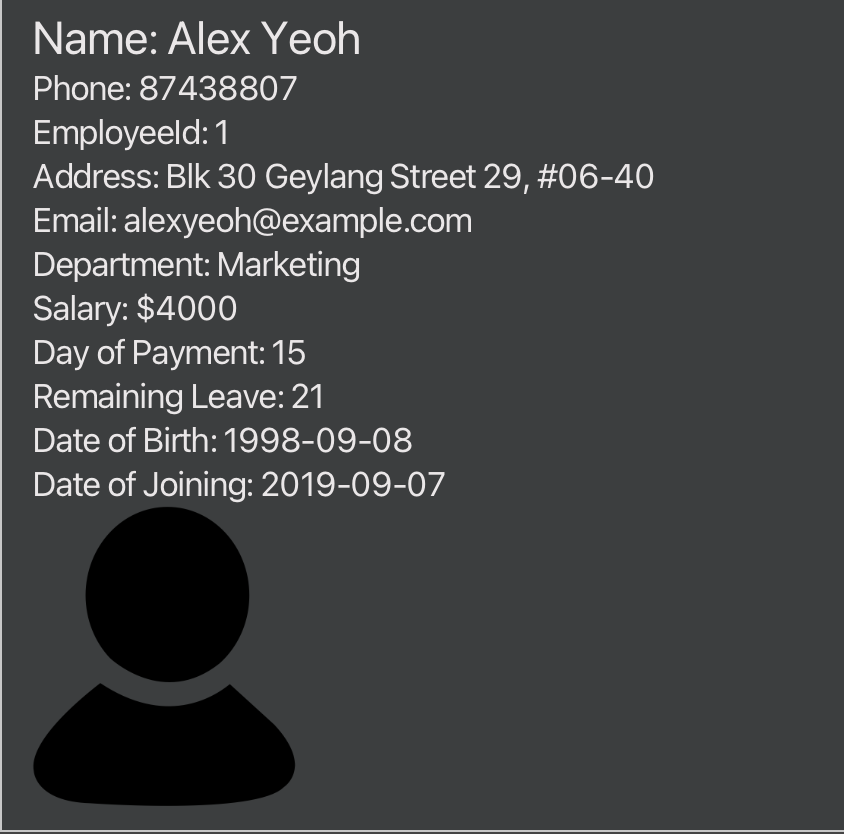
Display Panel
This section shows the full information of the selected employee.
Things to note:
- On startup of the application, this panel shows “Welcome to ExecutivePro”
- To view an employee’s particulars in this panel, click on one of the employees in the employee list.
- If you delete an employee that you are currently viewing, the display panel will display the particulars of the next employee in the list.
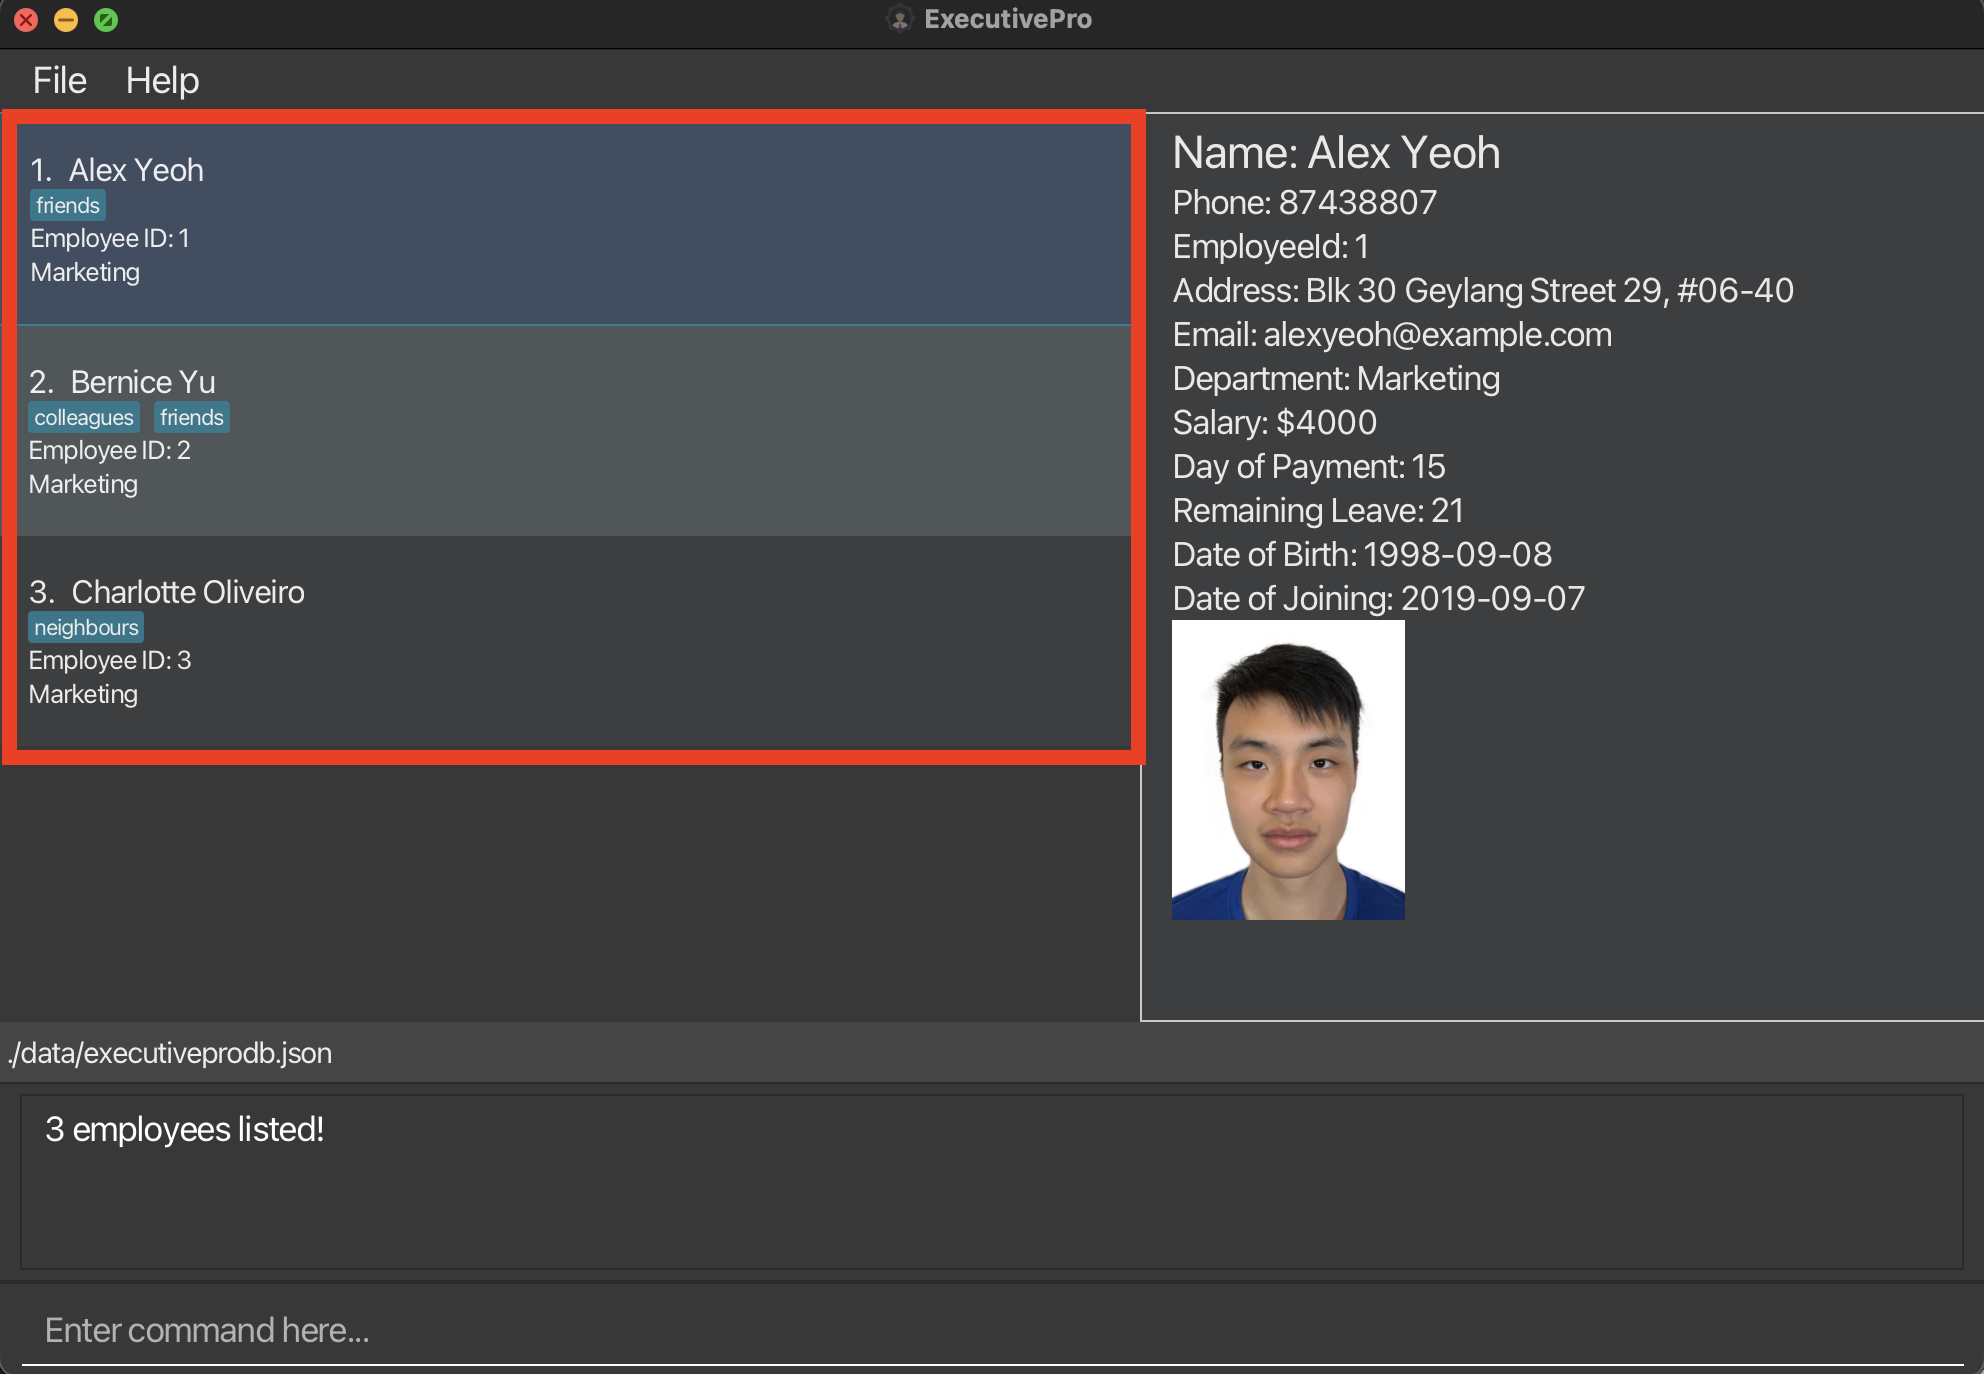
3. Employee List
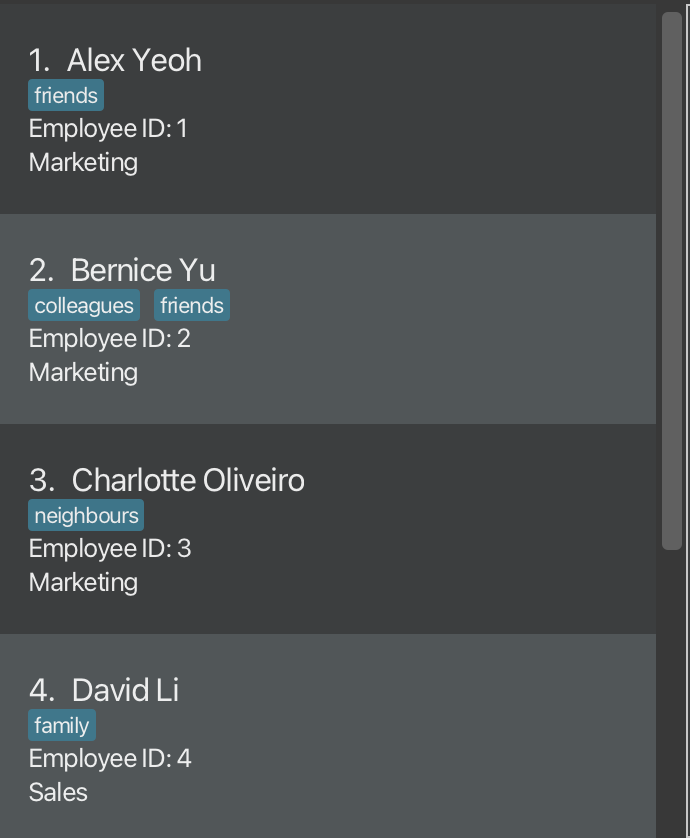
Employee List
This shows the whole employee list with their basic information such as Name, Employee ID, Department and their respective tags highlighted in blue.
This will come in handy if:
- You want a general overview of the employees in the company.
- You want to quickly find out an employee’s ID to edit their details.
4. Command Panel

Command Panel
This section displays relevant messages or errors after a command is entered.
5. Command Line Interface (CLI)

Command Line Interface (CLI)
In this section, you can enter your commands in the text box and click enter on your keyboard to send it to the application.
This is also known as a Command Line Interface or CLI for short. If you are new to CLI, a short introduction is available below.
To understand CLI better, here is an analogy: Imagine being in a restaurant with a talented chef in the kitchen. The chef represents the computer while a waiter is a button on your screen. Instead of having to go through the waiter or “click” a button, the CLI helps you communicate directly with the chef by giving specific instructions or “orders” about what you want to eat. Hence, the CLI is a way to interact with your computer by giving precise, text-based instructions, much like talking directly to a chef to customize your meal.
Why use CLI?
Using a CLI can greatly enhance your efficiency as you no longer have to toggle between the mouse and your keyboard. Don’t worry if this is your first time using the CLI, you’ll get used to it in no time.
How to use the CLI?
Simply type in a command in the text box and press enter on your keyboard to execute it. To execute additional commands, continue typing and hit enter after each one is completed.
Employee Profiles
ExecutivePro makes it easy for you to add, remove, or edit employee information. ExecutivePro builds an employee profile for every employee to store their personal particulars. These are the employee information that ExecutivePro can help you keep track of:
| Particular | Description | Compulsory? |
|---|---|---|
| Employee ID | Unique number for each employee | Automatically assigned when employee is added |
| Name | Name of employee | Compulsory |
| Phone | Phone number of employee | Compulsory |
| Department | Department of employee | Compulsory |
| Salary | Monthly salary of employee | Compulsory |
| Day of Payment | Day of the month that the employee is paid | Compulsory |
| Email address of employee | Optional | |
| Address | Home address of employee | Optional |
| Leave | Number of days of leave remaining | Optional (Default value: 21) |
| Date of Birth | Date of birth of employee | Optional |
| Date of Joining | Date when employee joined the company | Optional |
| Tag | Used to record any other employee information | Optional |
In addition, you can upload a profile picture for each employee (click here), that will be shown in the display panel when the employee is selected.
- Tag an employee as “Software Engineer” to record their role within their department.
- Tag an employee as “Vegetarian” to take note of their dietary requirements.
Features
This section lists the details of all the features of ExecutivePro.
Help Command
Viewing help : help
We know that there can be a lot of information to take in for a new user, so if you ever feel lost while using ExecutivePro, getting help is just a simple step away.
Entering the help command will open up the Help Window that looks like this.
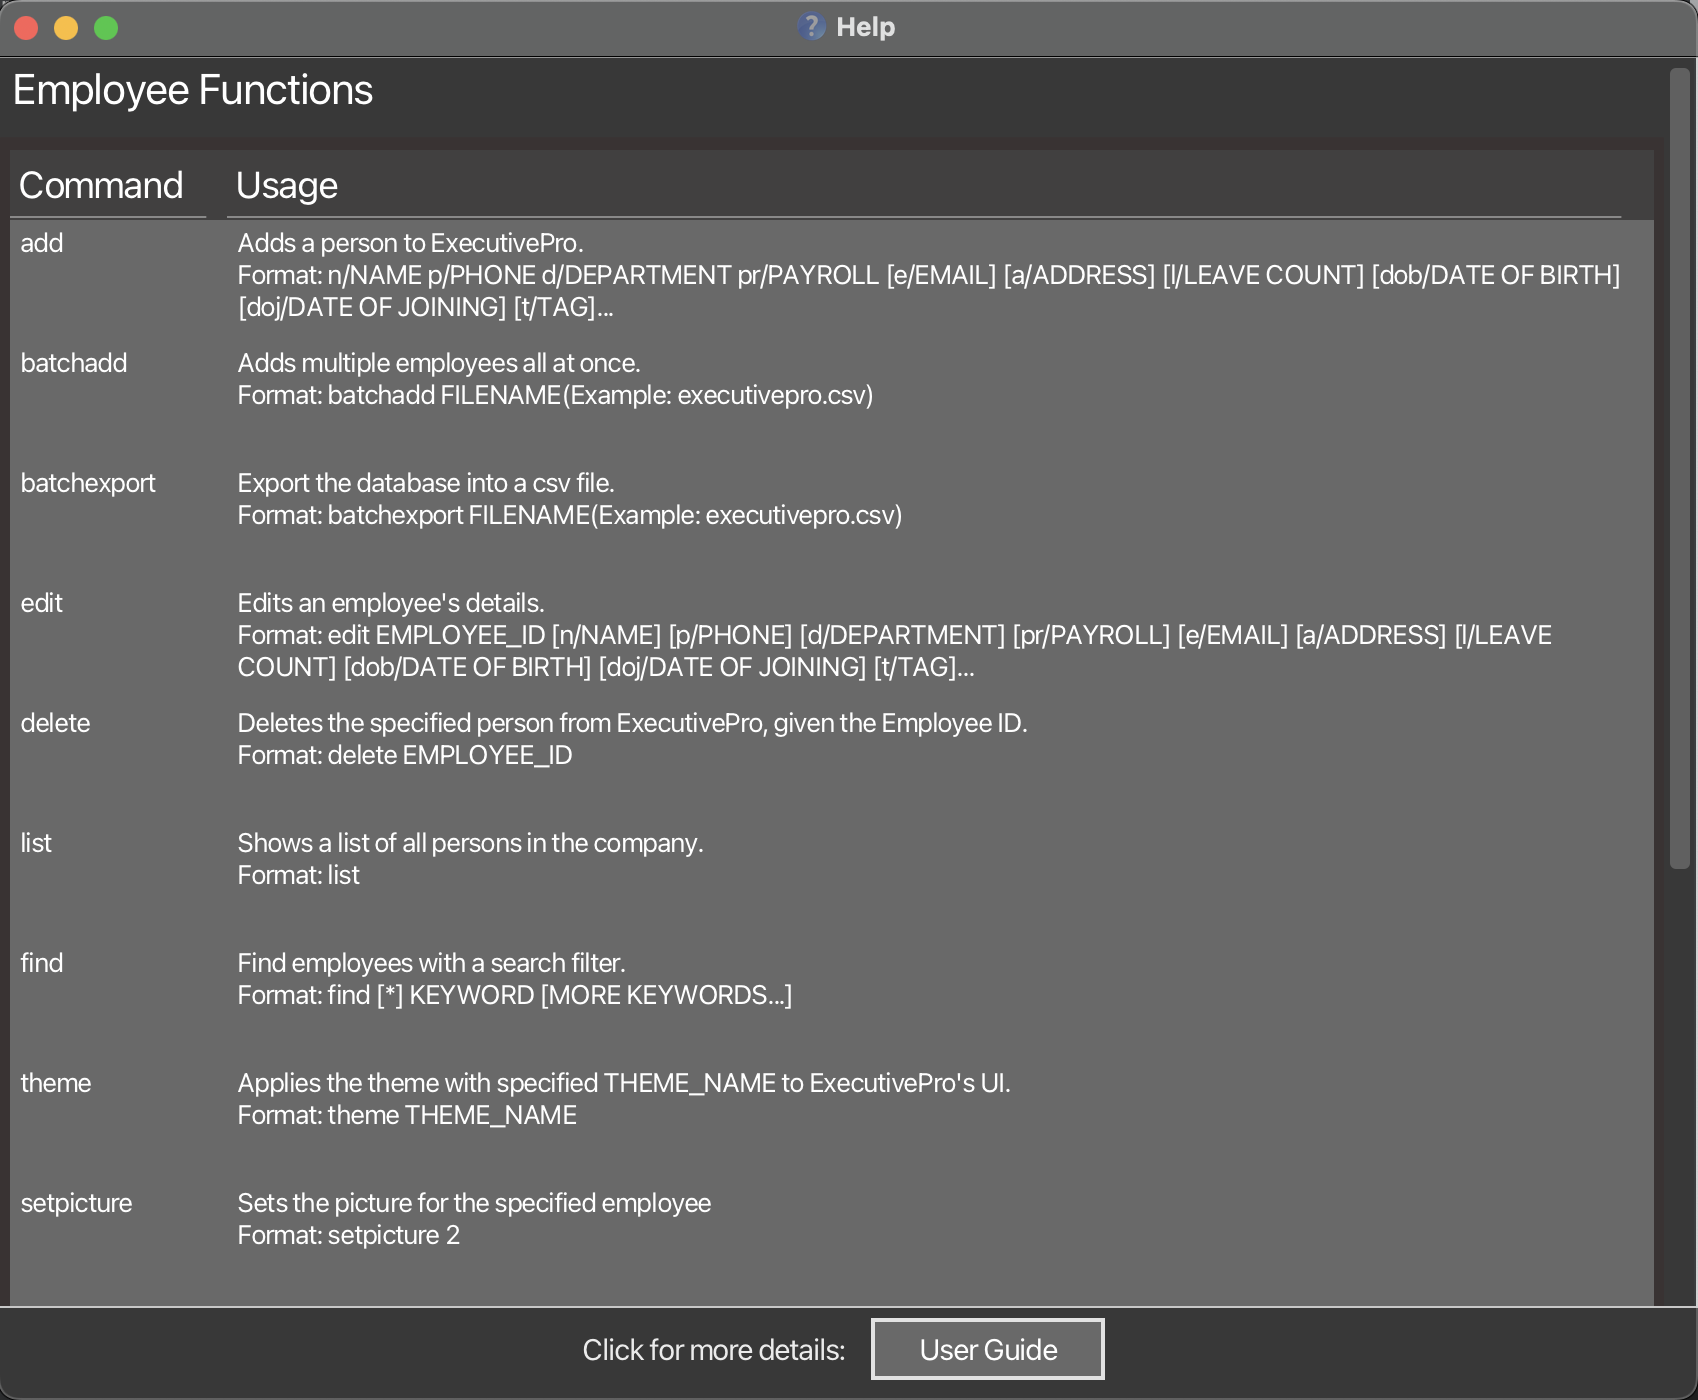
Help Window
On the left column, you can find the full list of ExecutivePro commands and on the right are the details for each command. If you require more information, the Help Window also contains a button at the bottom to open up this User Guide in your browser.
Format: help
Import/Export of Employee Details
Adding an employee: add
How do we build an employee profile?
The first step is to add a new employee using the add command along with any particulars that you want to include in the input format specified below.
Upon successfully adding a new employee, ExecutivePro will then keep track of the new employee profile in the
database, and you are free to access and modify the particulars later on with the edit command.
However, this function could fail (and ExecutivePro does not add the employee), if:
- There are missing compulsory particulars. You can refer to the input format below for help, or find the list of compulsory particulars here.
- The particulars are in the wrong format, the program will prompt you on the correct format. Alternatively, you can find them here.
- The new employee added is a duplicate, i.e. there is someone in the database who already shares the same name, phone number and email.
Format: add n/NAME p/PHONE_NUMBER d/DEPARTMENT pr/PAYROLL [e/EMAIL] [a/ADDRESS] [l/LEAVE_COUNT] [dob/DATE_OF_BIRTH] [doj/DATE_OF_JOINING] [t/TAG]...
Examples:
add n/John Doe p/98765432 d/Marketing pr/1000 15 e/johnd@example.com a/John street, block 123, #01-01add n/Betsy Crowe p/1234567 d/Sales pr/4000 1 e/betsycrowe@example.com a/Newgate street, block 576, #01-02 dob/2000-04-21 doj/2022-01-04 t/friend
Adding multiple employees at once: batchadd
Tired of adding new employees one by one?
ExecutivePro allows you to add multiple employees at once from a .csv file.
This feature will come in handy if:
- You are a new user and have your existing employee data stored in a
.csvfile. - There has been a recruitment cycle and the company has multiple new employees.
With this feature, you would not need to spend time to manually add each employee in!
Format: batchadd FILENAME
Example:
batchadd executivepro.csv
Here are the steps to use this command:
Step 1 (Creating CSV file) :
Things to note:
- A header row is required to indicate the purpose of the field and must be the first row in the CSV file.
- For multiple tags for an employee, the tags should be separated by “/”.
Sample CSV file:

Sample CSV file
Step 2 (Uploading CSV file) :
Before we proceed to uploading the CSV file, you would need to have followed the instructions
at the start of the user guide, in order
to upload your csv file in the data folder
Once that is done,
- Go to the folder where you stored the
jarfile. - Move your desired CSV file to the
datafolder.
Location of CSV file to be placed in
Step 3 (Running CSV file) :
- Once done, run
batchadd FILENAMEin the CLI.
If the command is successful, the employees in the file should be added to the database like below:
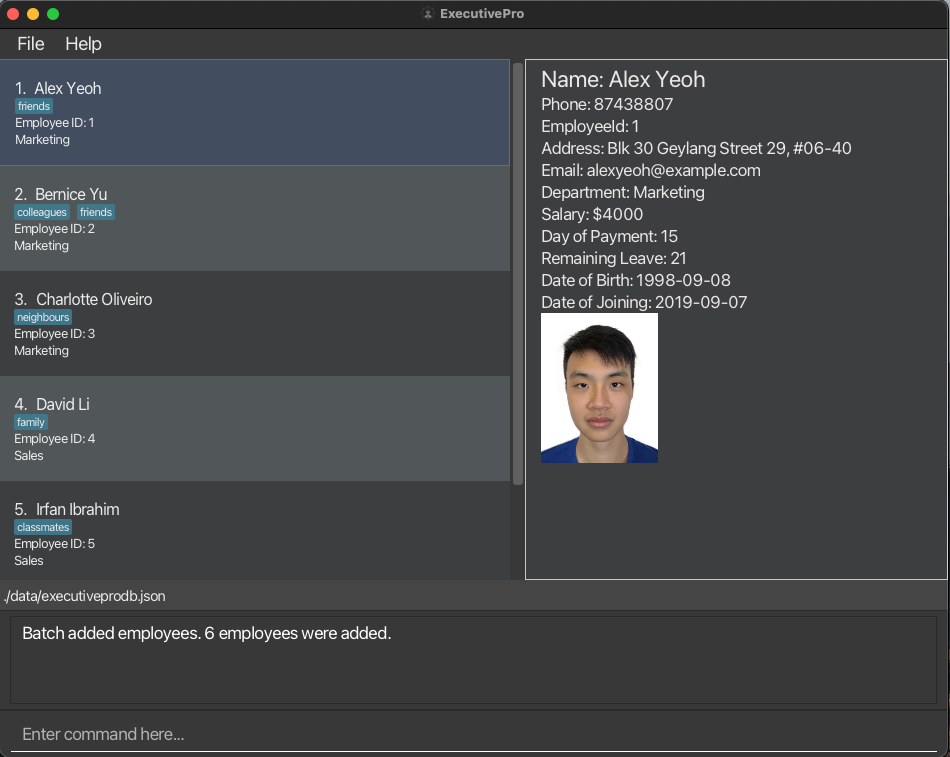
Successful batchadd of employees
The command could be unsuccessful, and there are a few potential causes of this:
- There could be a duplicate entry in the file, i.e. two employees sharing the same identity in the file.
- If any of the particulars in the wrong format, ExecutivePro will not be able to read the file properly and the command will not run.
- If you are using Excel to open your CSV file, the date formatting in Excel might not be set to the right format, please refer to the instructions here
In the case of an unsuccessful Batch Add, NONE of the employees in the CSV will be added.
Also note that as of version 1.3 , this feature only supports CSV files and adding employees with the fields mentioned above.
Opening .csv files in Excel
When using the batchadd feature, it is crucial to ensure that the dates in the CSV file are in the correct format.
ExecutivePro expects dates to be in the following format: YYYY-MM-DD. If the dates in your CSV file are in a different format, you’ll need to convert them before uploading the file to prevent errors and unsuccessful imports.
Follow the steps below to ensure the dates in Excel are following the correct format:
- Firstly, you can select the two columns involving dates,
Date of BirthandDate of Joining, just like the image below.
Selecting date columns in Excel file - Next, right-click on the selected columns so that the following shows up:

Right click to format selected cells - Click on
Format Cells...and the table below will appear: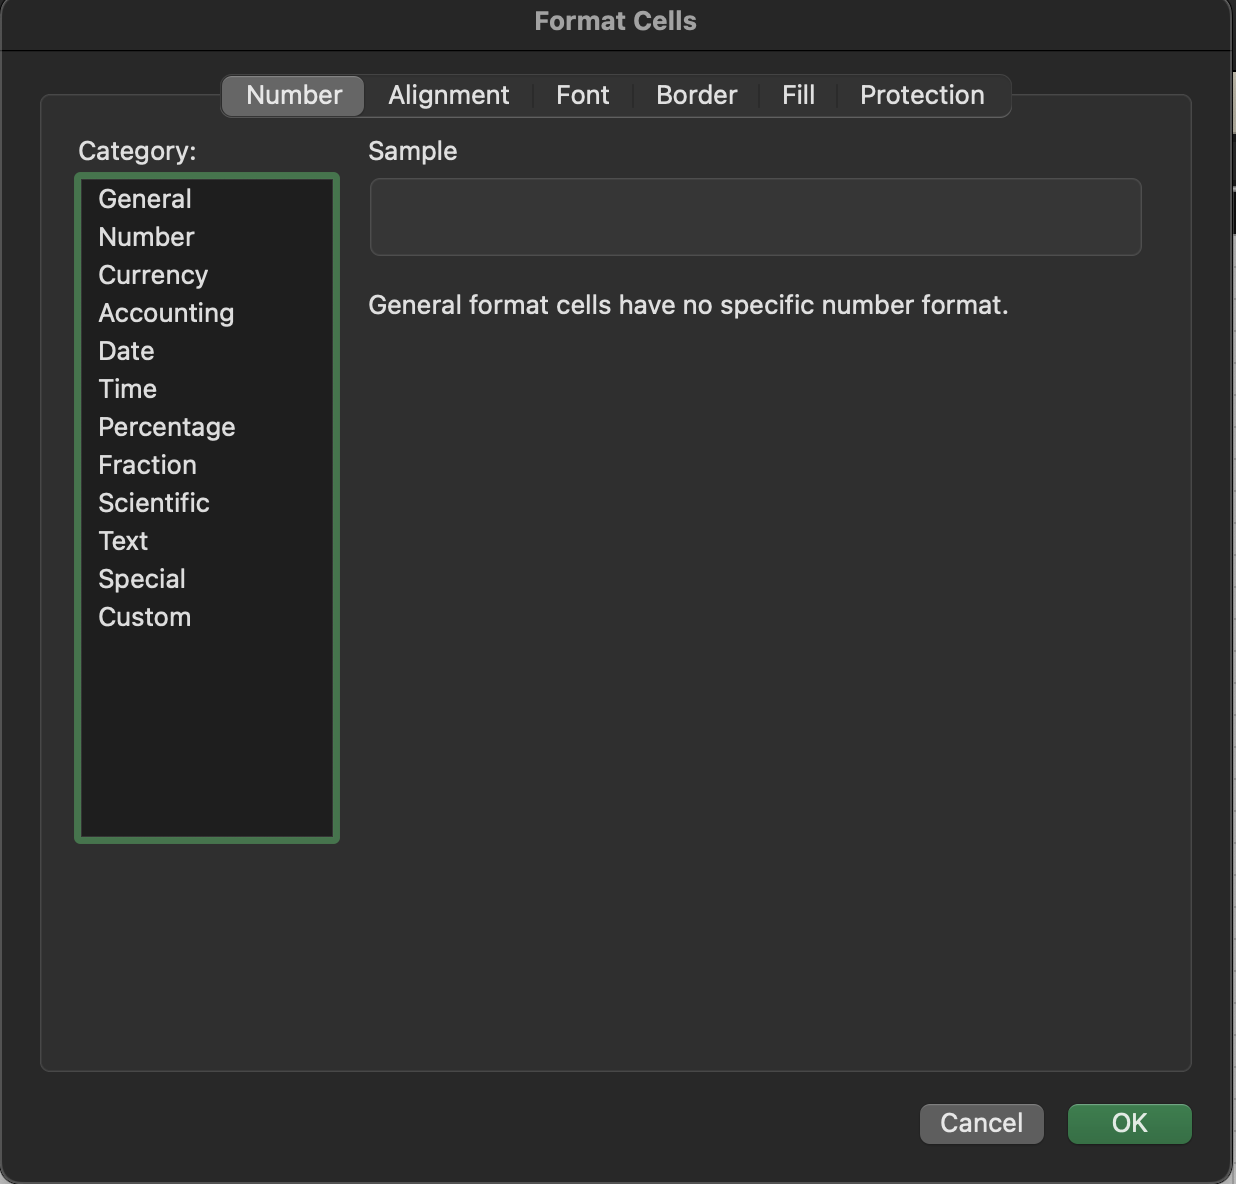
Format cells table - Click on
Date: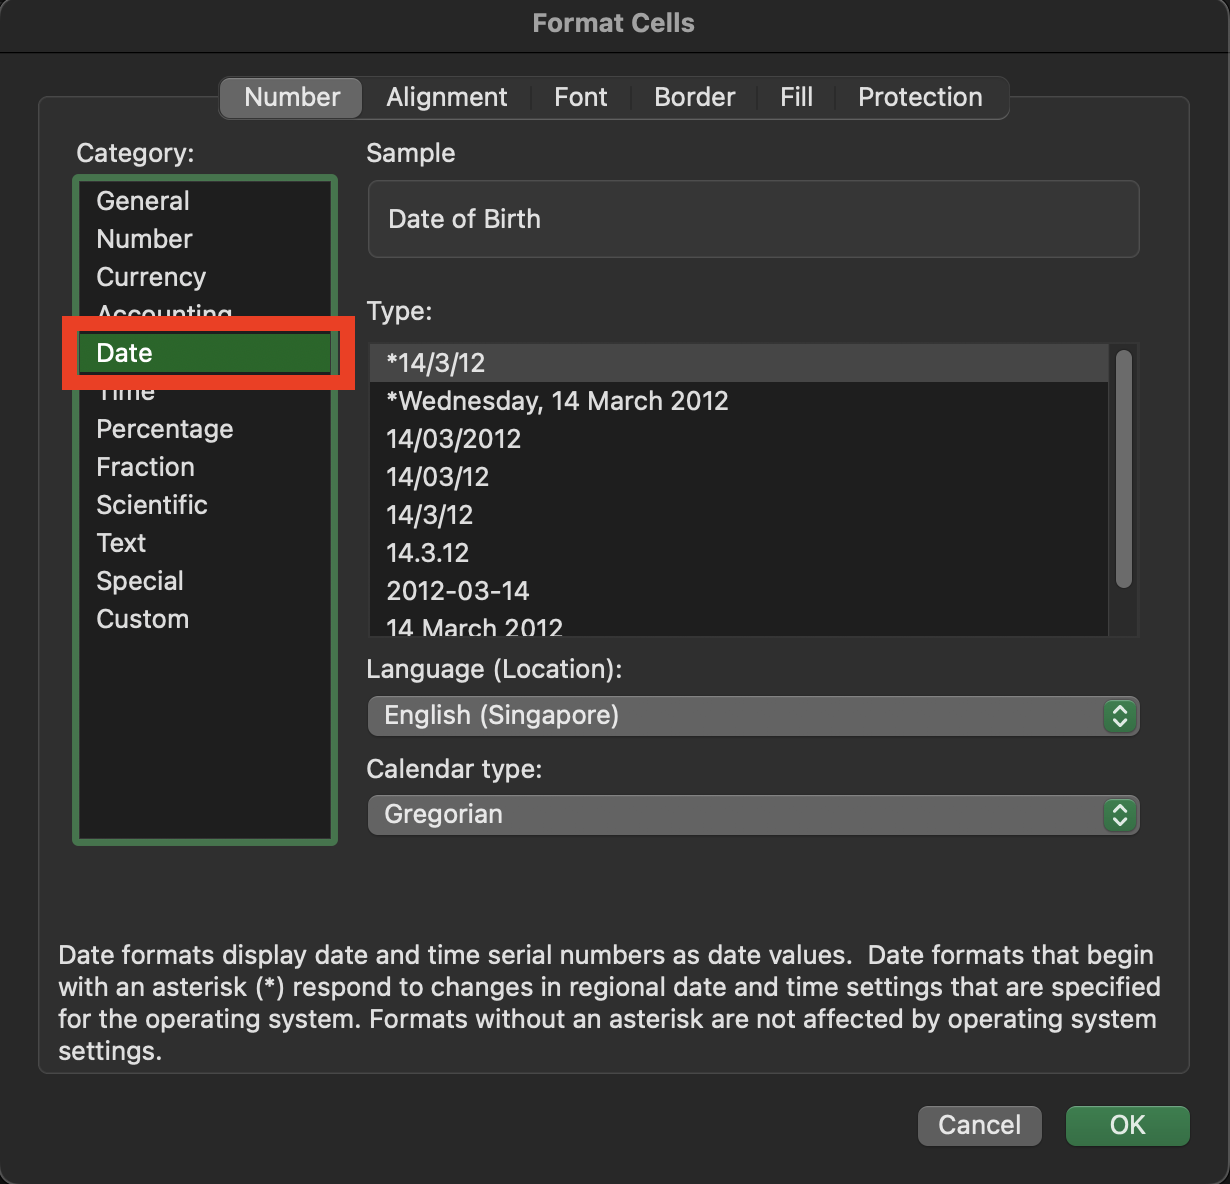
Clicking on date - Select the correct date format (“YYYY-MM-DD”):
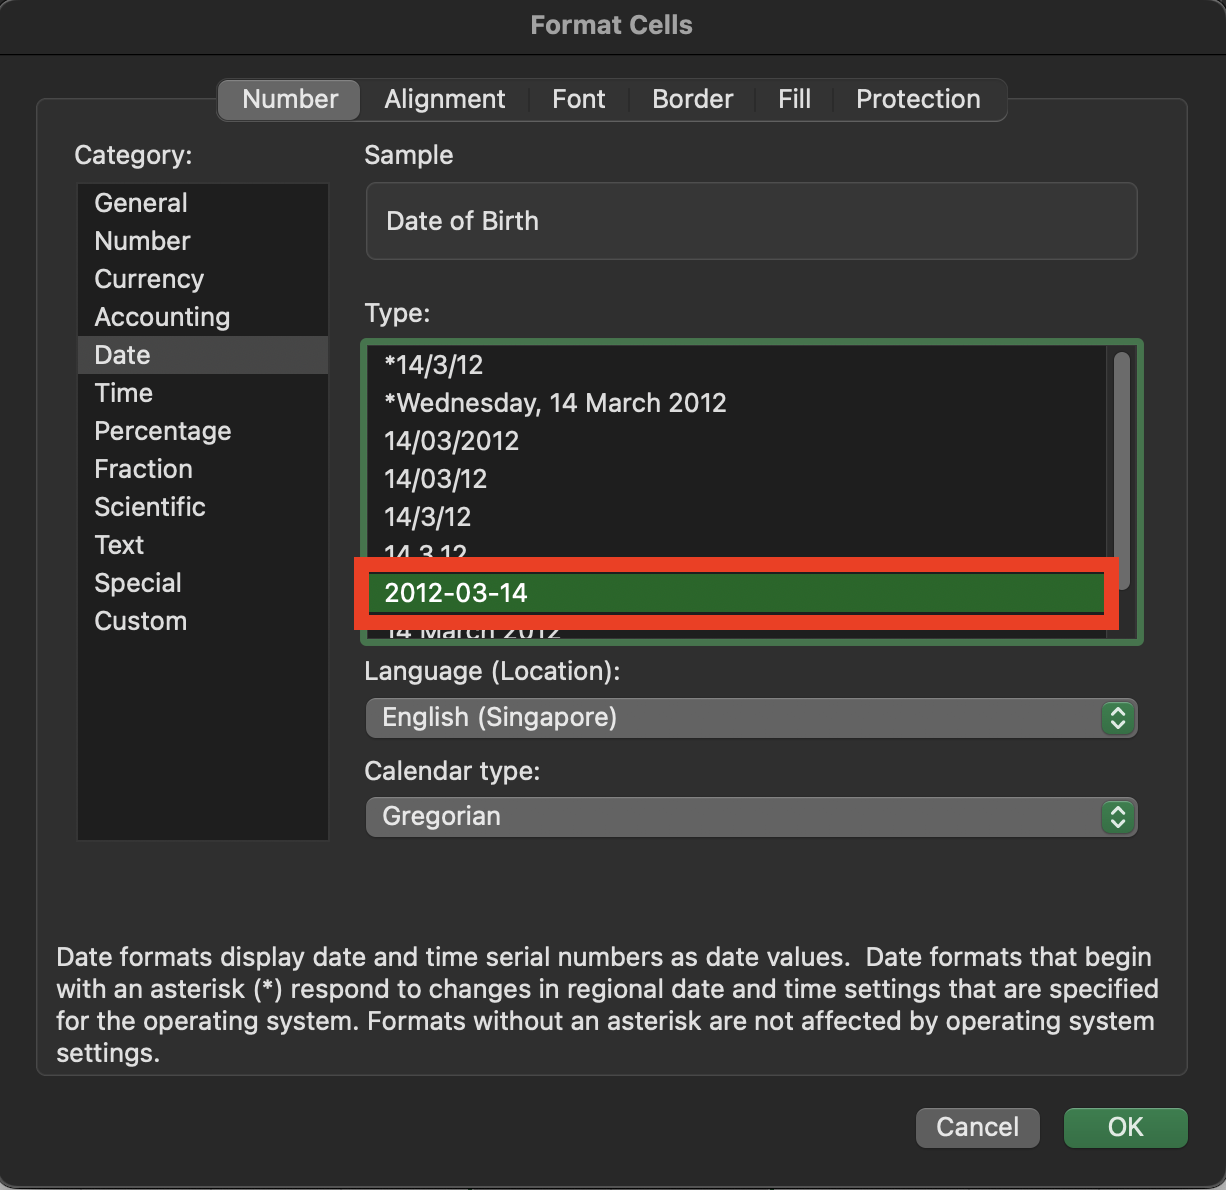
Correct date format - Click
OKand the date in the file will be updated to the correct format:
Correct date format in Excel file
Once the dates in your CSV file are in the correct format (YYYY-MM-DD), you can proceed with the batchadd command in ExecutivePro. This will ensure a smooth import process, and all employee information, including dates, will be properly stored in the database.
Exporting database into CSV file: batchexport
ExecutivePro allows you to export the employees’ data into a CSV file.
Format: batchexport FILENAME
Example:
batchexport exported_database.csv
Here are the steps to use this command:
Step 1 (Exporting to CSV file) :
- Run
batchexport FILENAMEin the command panel. The result should look like the image below.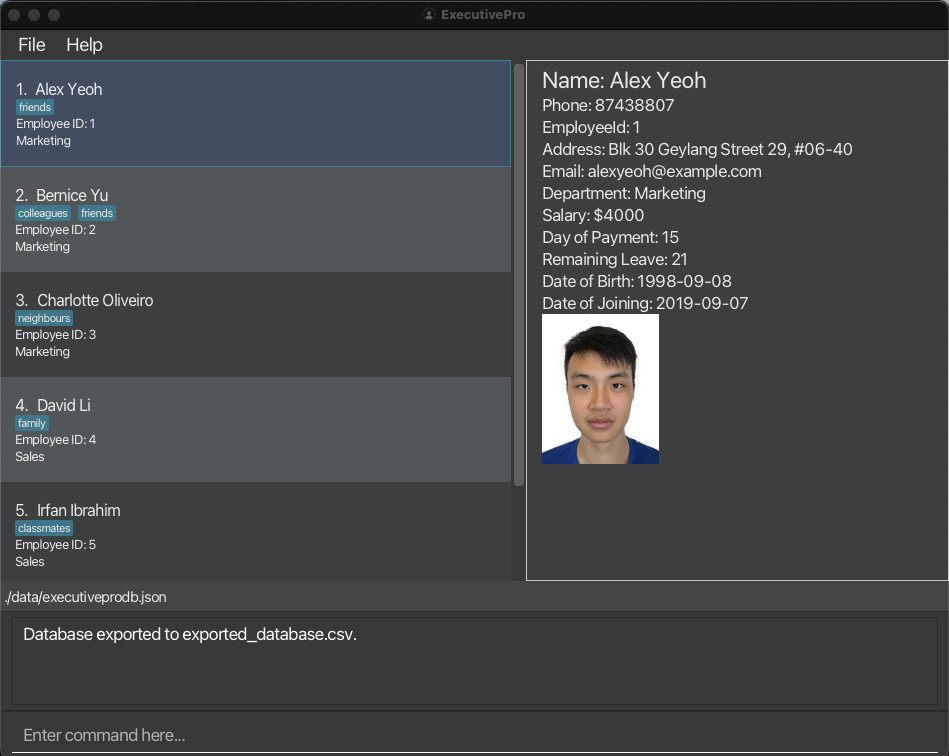
Successful batchexport of database -
Go to the folder where you stored the
jarfile. - Locate the CSV file in the
datafolder.
If the command is successful, there should be CSV file that contains all the employees’ details from the database, and it should look something like the below image.

Location of exported CSV file
.csv file in Excel
and save it without ensuring that the date format is correct (YYYY-MM-DD), the dates might be saved in a different format,
leading to issues when importing the file using the batchadd command.
To ensure the correct date format is saved, please refer to the instructions here
.csv file and not any other file types.
Editing Employee Details
Editing an employee : edit
There could be instances where you have to edit the details of an employee. It could be due to a typo or that your employee has changed their personal particulars. Simply follow the format given below to edit those details.
Format: edit EMPLOYEE_ID [n/NAME] [p/PHONE_NUMBER] [d/DEPARTMENT] [pr/PAYROLL] [e/EMAIL] [a/ADDRESS] [l/LEAVE_COUNT] [dob/DATE_OF_BIRTH] [doj/DATE_OF_JOINING] [t/TAG]...
- Edits the details of the employee with the specified
EMPLOYEE_ID. If such an employee doesn’t exist, an error message will be shown. - At least one of the optional fields (in brackets above) must be provided.
- Existing values will be updated to the input values.
- When editing tags, the existing tags of the person will be removed i.e. adding of tags is not cumulative.
- You can remove all the person’s tags by typing
t/without specifying any tags after it.
Examples:
-
edit 1 p/91234567 e/johndoe@example.comChanges the phone number and email address of the employee with ID1to be91234567andjohndoe@example.comrespectively.
Here are the steps to use this command:
Step 1 (Inputting the edit command) :
You can use the command syntax to edit an employee’s fields, the image below demonstrates the command edit 1 p/91234567.
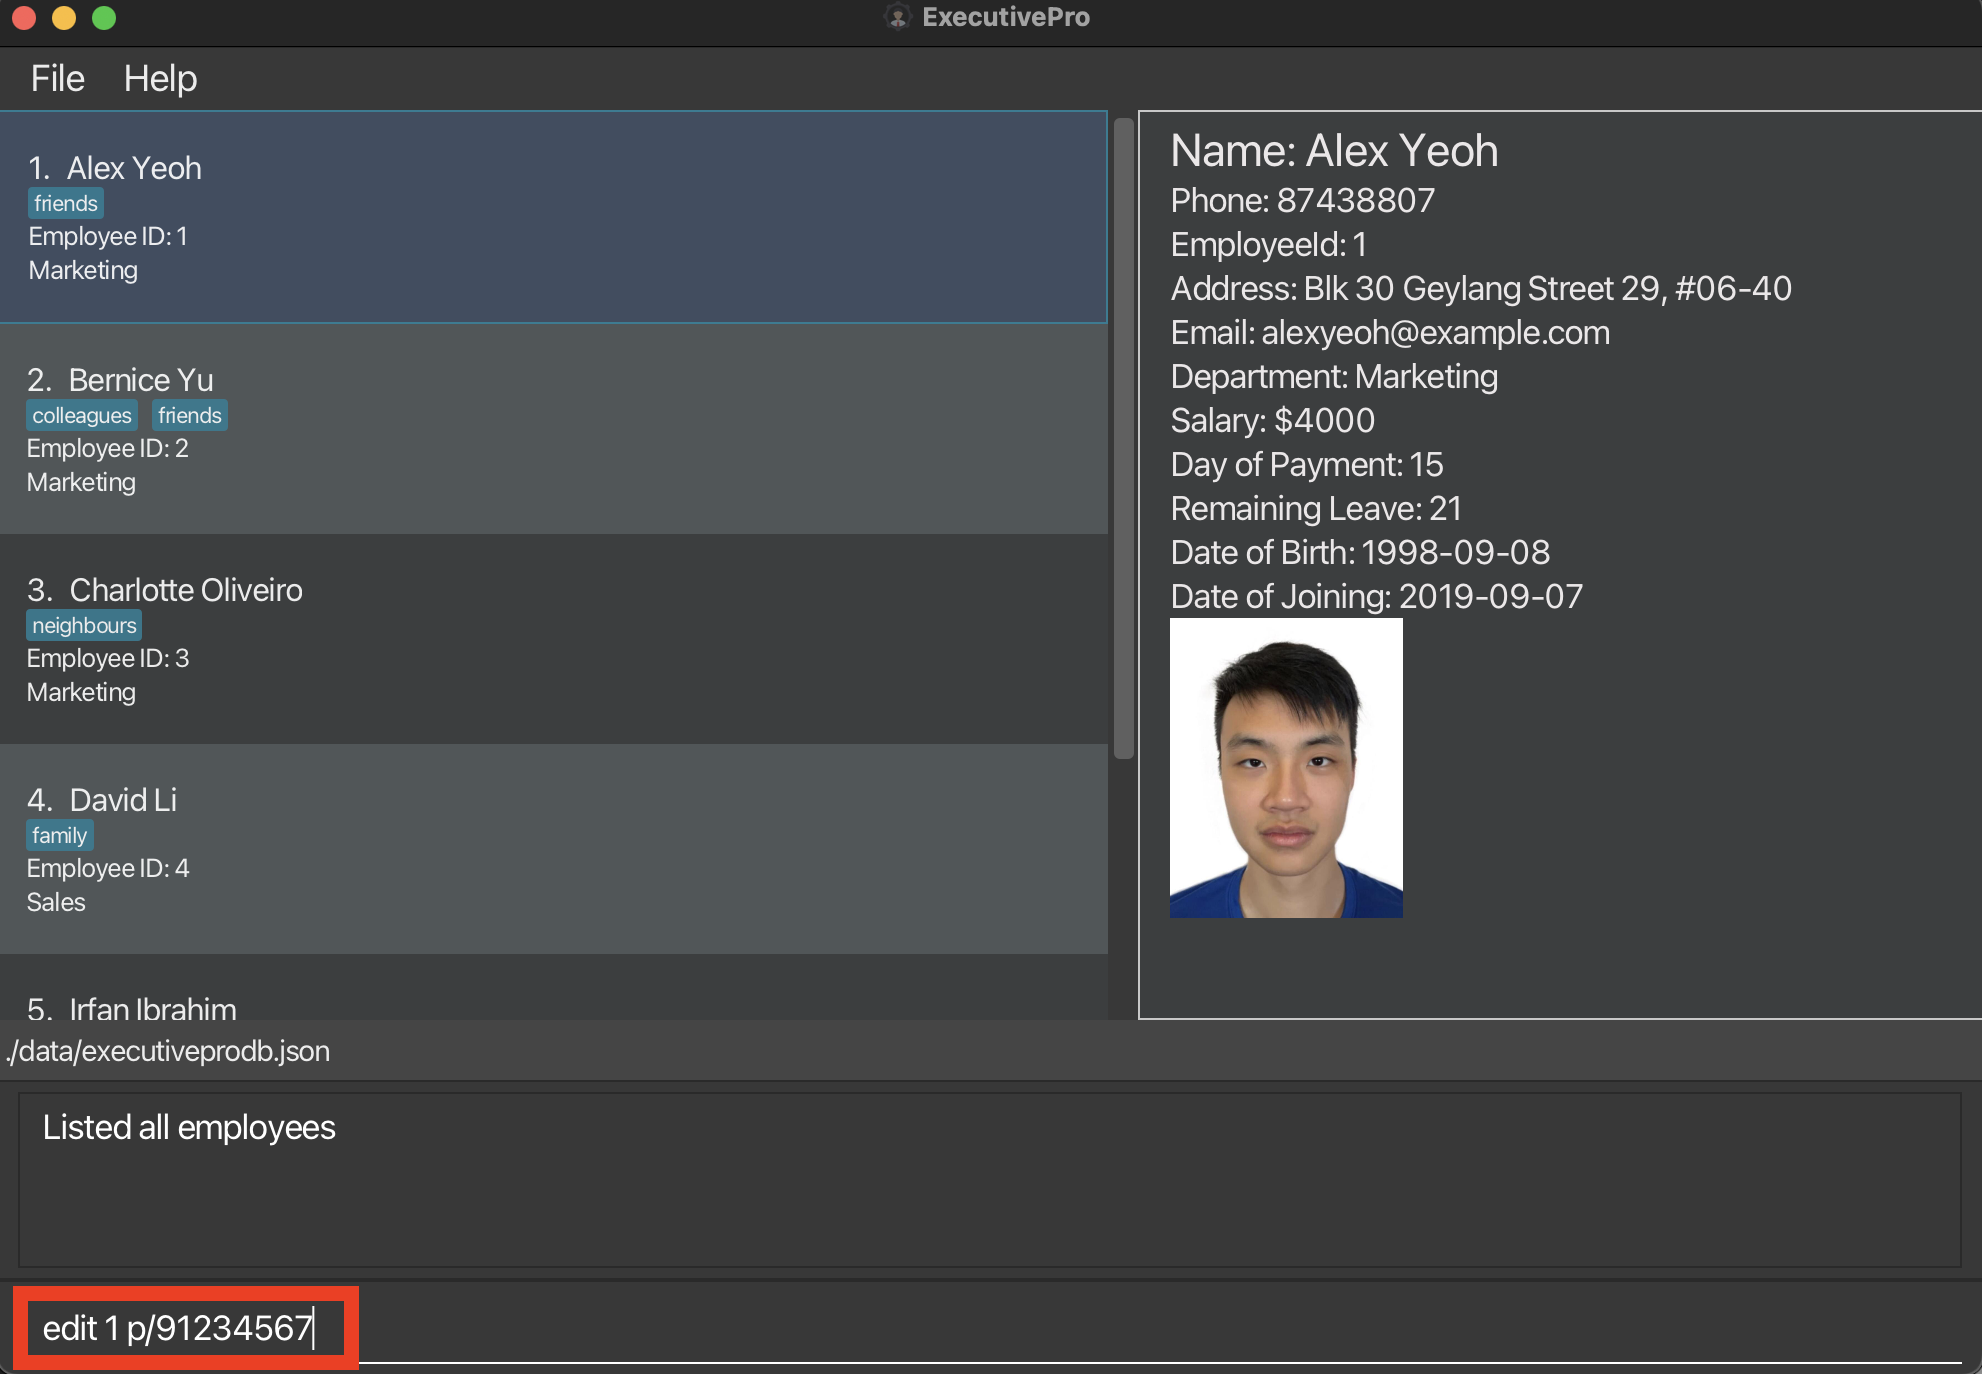
Editing phone number of employee with Employee ID 1
Step 2 (Results displayed) :
The employee with the provided employee ID would have their fields edited accordingly, in this example, Alex Yeoh with employee ID 1 his phone number edited to 91234567.
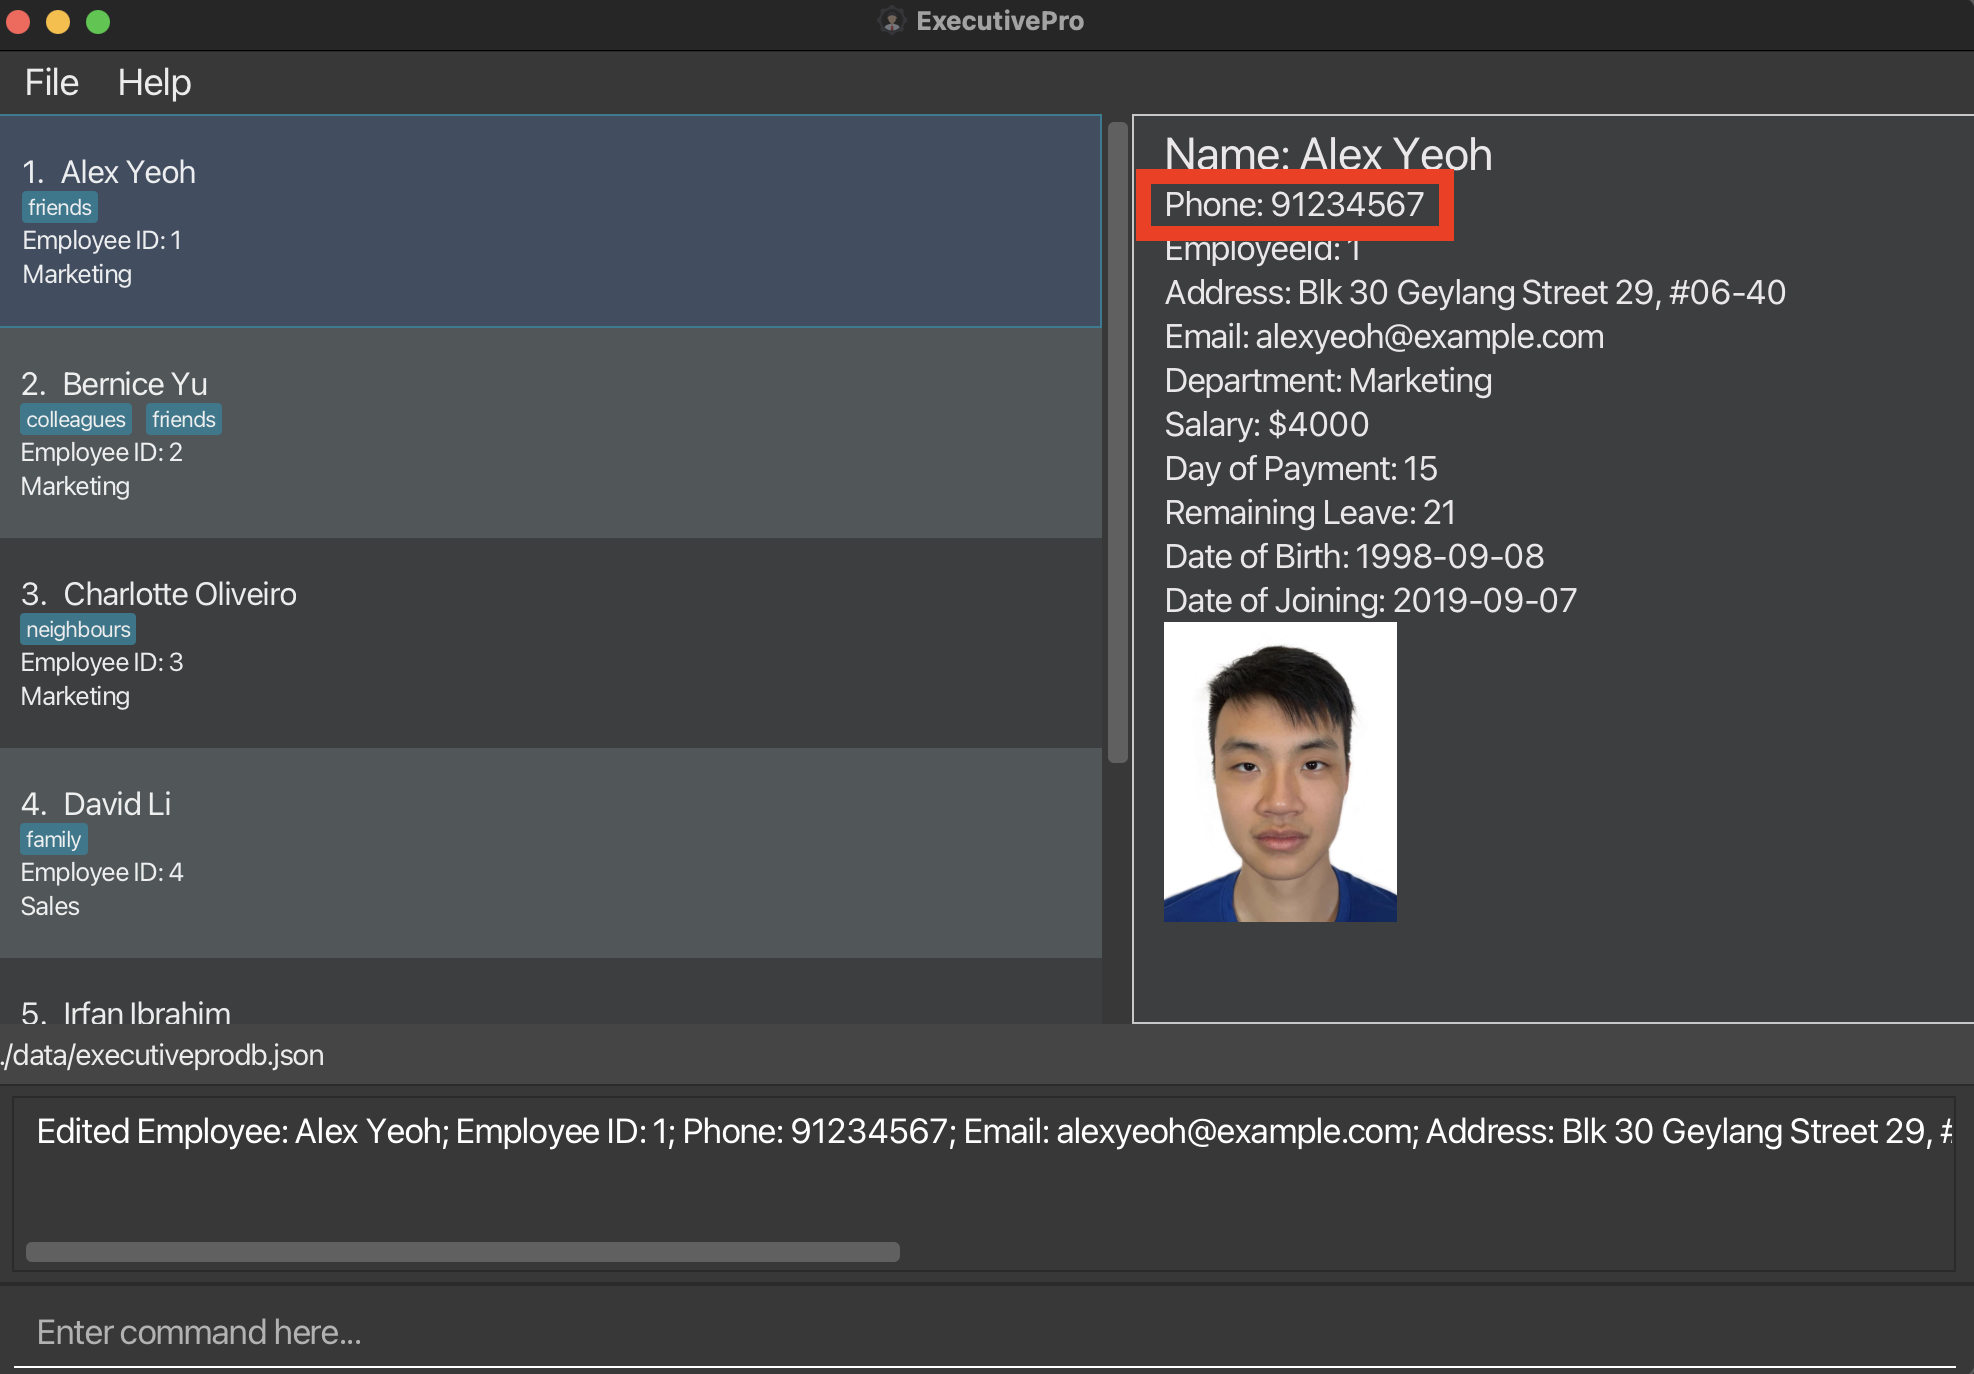
Results displayed after edit command is entered
Taking leave : leave
There are plenty of instances where employees take leave, and it is such a tedious task to manage employee leaves. ExecutivePro allows you to help your employees take leave so you no longer have to manually track remaining leaves for each employee. Note that for resetting or increasing an employee’s leave count use the edit command above instead. (leave can only help an employee take leave).
Format: leave EMPLOYEE_ID l/LEAVE_COUNT
- Helps the employee with the specified
EMPLOYEE_IDtake leave. If such an employee doesn’t exist, an error message will be shown. - Number of days of leave is specified by
LEAVE_COUNT. If the employee does not have enough remaining leave, an error message will be shown. - Existing leave count will decrease by the number of days of leave taken.
Examples:
-
leave 1 l/3Helps the employee with ID1take3days of leave.
Setting an employee’s picture : setpicture
This feature allows you to set a profile picture for the specified employee, by uploading an image file from your computer into the ExecutivePro database.
![]() Note:
The selected image file must be in either the
Note:
The selected image file must be in either the .png, .jpg, or .jpeg file formats.
Format: setpicture EMPLOYEE_ID
- Sets the picture of the employee with the specified
EMPLOYEE_ID. - The
EMPLOYEE_IDrefers to the id of an employee shown in the displayed employees list. - The
EMPLOYEE_IDmust be a positive integer 1, 2, 3, …
Examples:
-
setpicture 1sets the picture for the employee with EMPLOYEE_ID 1.
Below are the steps to use this command:
Step 1 (Inputting the command) :
Run the setpicture command e.g. setpicture 1 in the CLI.
A file explorer window should appear, as shown below:
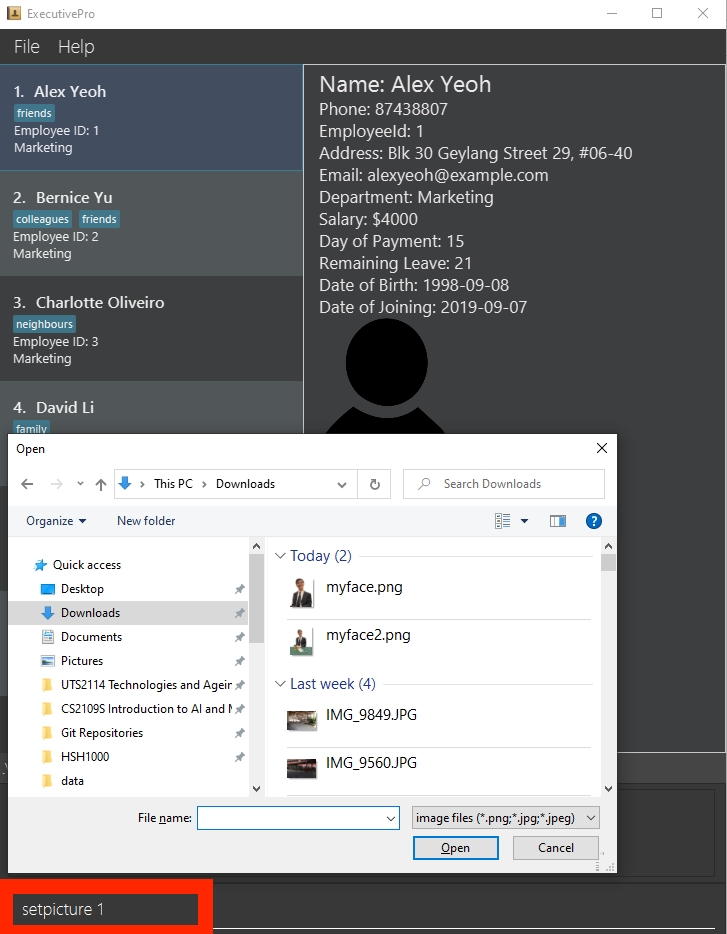
File selector appearing
Step 2 (Selecting an image) :
Search through your computer for the image you want to set as the employee’s profile picture. Click on the image in your file explorer to select it, then open it by clicking the “Open” button on the file explorer or by pressing the “Enter” key on your keyboard.
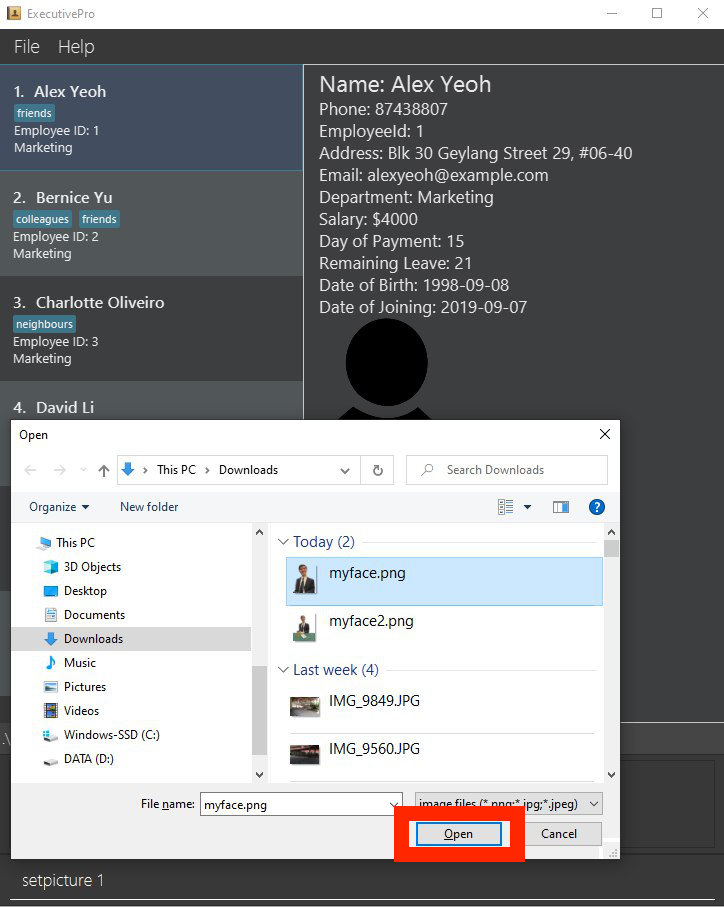
Choosing image
Step 3 (Seeing the result) :
Click on the specified employee in the employee list. ExecutivePro should now display the employee’s picture in the display panel as shown below.
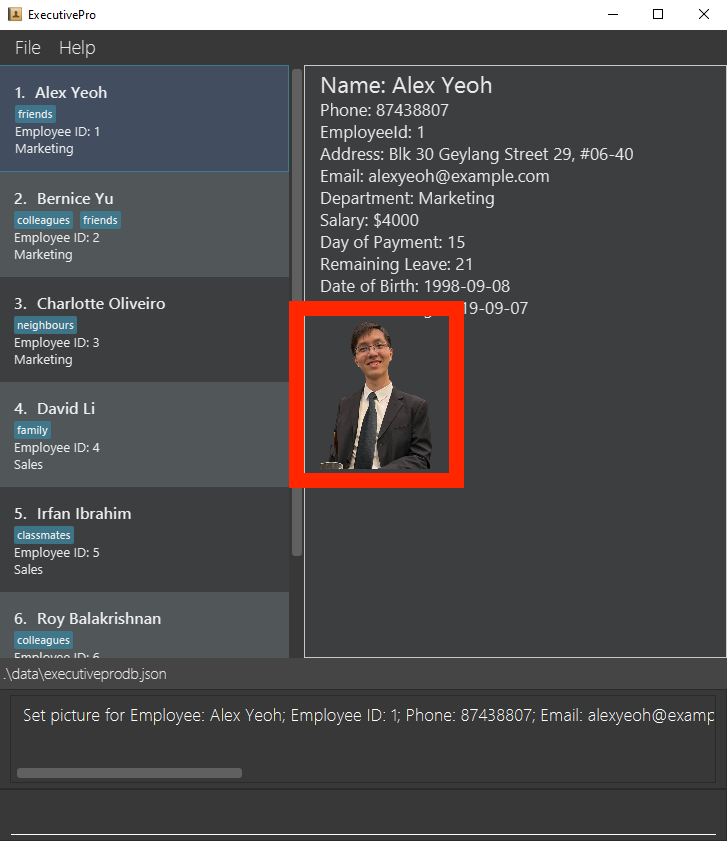
Picture displayed on display panel for selected employee
example.txt file to a example.png). We encourage you to use an image converter to convert your image to the valid file format,
before uploading it to ExecutivePro.
Deleting an employee : delete
As time passes, you might run into instances where an employee leaves the company, and that their details have to be removed
from the database. delete would help to remove the details of the employee with the specified EMPLOYEE_ID
from the ExecutivePro database.
Format: delete EMPLOYEE_ID
- You can delete the details of the employee with the specific
EMPLOYEE_ID. - The
EMPLOYEE_IDrefers to the id of an employee shown in the displayed employees list. - The
EMPLOYEE_IDmust be a positive integer 1, 2, 3, …
Examples:
-
delete 2deletes the employee with EMPLOYEE_ID 2 in ExecutivePro.
Clearing the data: clear
Clears all the data currently stored in the database.
If you are a new user, you can use this command after you have experimented with ExecutivePro to start keying in your actual employee information.
Format: clear
Viewing Employee Details
Locating employees by keyword: find
As your database gets larger, scrolling and finding a certain employee becomes harder. However, ExecutivePro will ease this process
through the find command. This command helps you find employees using their names and/or departments.
Format: find [*] KEYWORD [MORE_KEYWORDS]
-
findcommand finds employees using the keyword you input. Those keywords can only be used to find the employee’s name or their department. - If asterisk (
*) is inputted, it displays a list of employees matching all the given keywords. - If asterisk (
*) is not inputted, it displays a list of employees matching any of the given keywords. - For name, even if there is a partial match between your keyword and the employees name, that employee will be listed.
- For department, there has to be a full match between your keyword and the employee’s department.
Examples:
-
find John Salesdisplays a list of all employees whose full name contains a ‘John’ in it, or if they are in the ‘Sales’ department -
find * John Salesdisplays a list of all employees in the ‘Sales’ department and who have a ‘John’ in their name
Here are the steps to use this command:
Step 1 (Inputting the search keywords) : Following the command format above, you can find employees with the specified keywords, just like the image below.
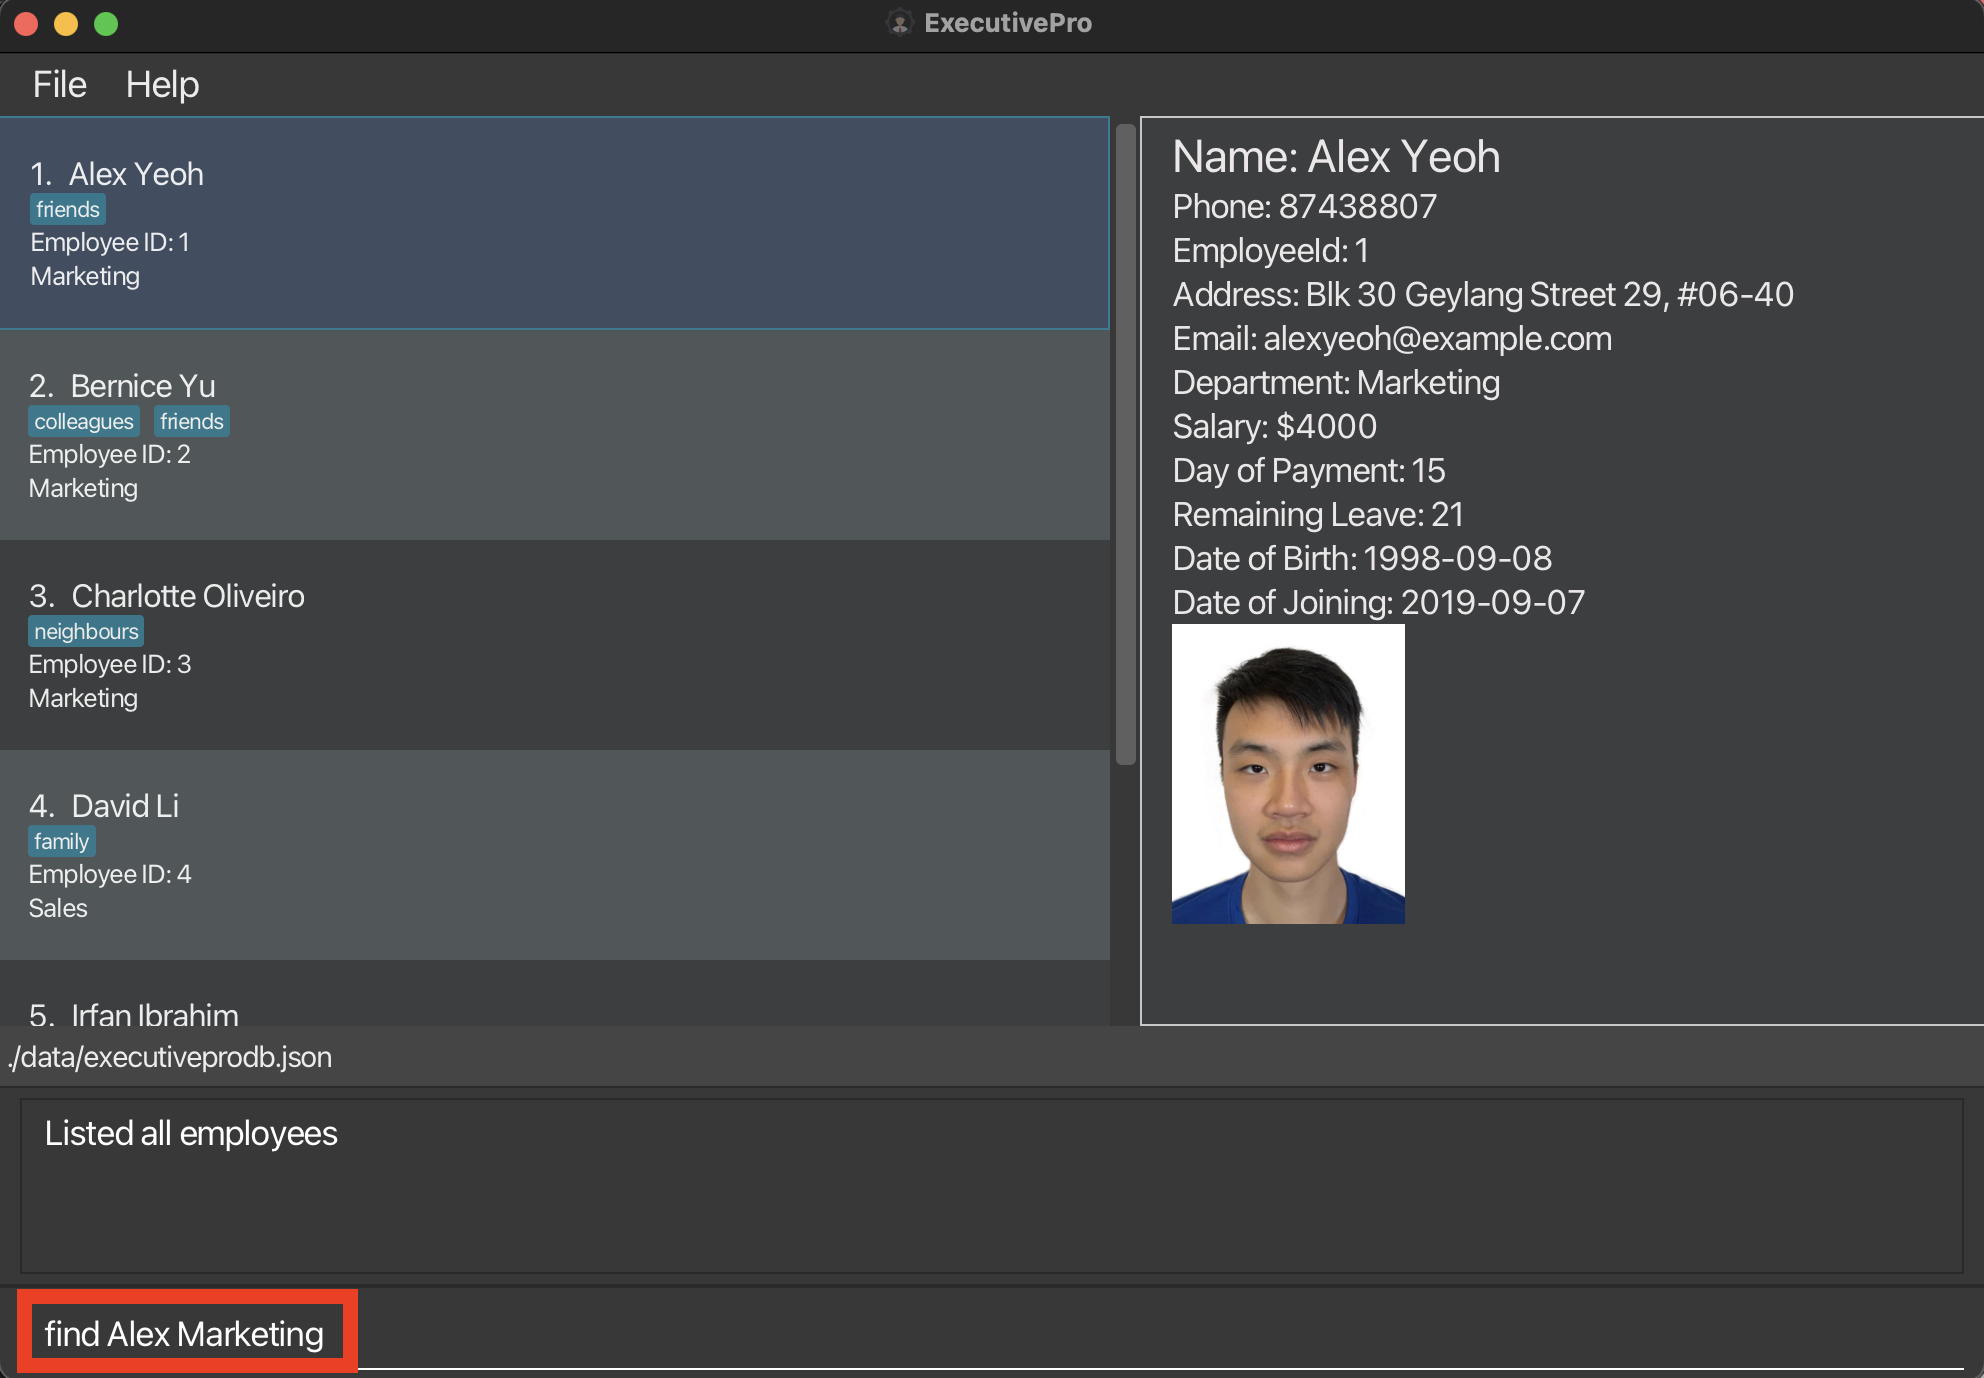
Input search keywords: "Alex Marketing"
Step 2 (Results displayed) : All the employees who match the keywords will be listed.
Results after find command is entered
Filtering out employees: filter
Similar to the find command, the filter command helps you to search for employees by their salaries or remaining leave counts.
Furthermore, you can find employees whose salaries/leave counts are greater than/lesser than/equal to a specified amount.
Format: filter FILTER_PARAMETER BOOLEAN_OPERATOR COMPARISON_AMOUNT
- You can create your own condition based on which the employees will be filtered.
- The filtering condition can be
pr(for employee salaries) orl(for remaining leave counts). - The filtering condition checks the salaries or leave counts of employees against a
COMPARISON_AMOUNT. - The filtering condition can either be greater than (
>), lesser than (<) or equal to (=) theCOMPARISON_AMOUNT. - The
COMPARISON_AMOUNTmust be a non-negative integer.
Examples:
-
filter pr > 1000displays a list of all employees whose salaries are greater than 1000 -
filter l = 1displays a list of all employees who have only 1 leave left
Here are the steps to use this command:
Step 1 (Creating the criteria) : Following the command format above, you can filter for employees with salaries greater than 500, just like the image below.

Filtering employees with salaries greater than 500
Step 2 (Results displayed) : All the employees who have satisfied the criteria will be listed.
Results displayed after filter command is entered
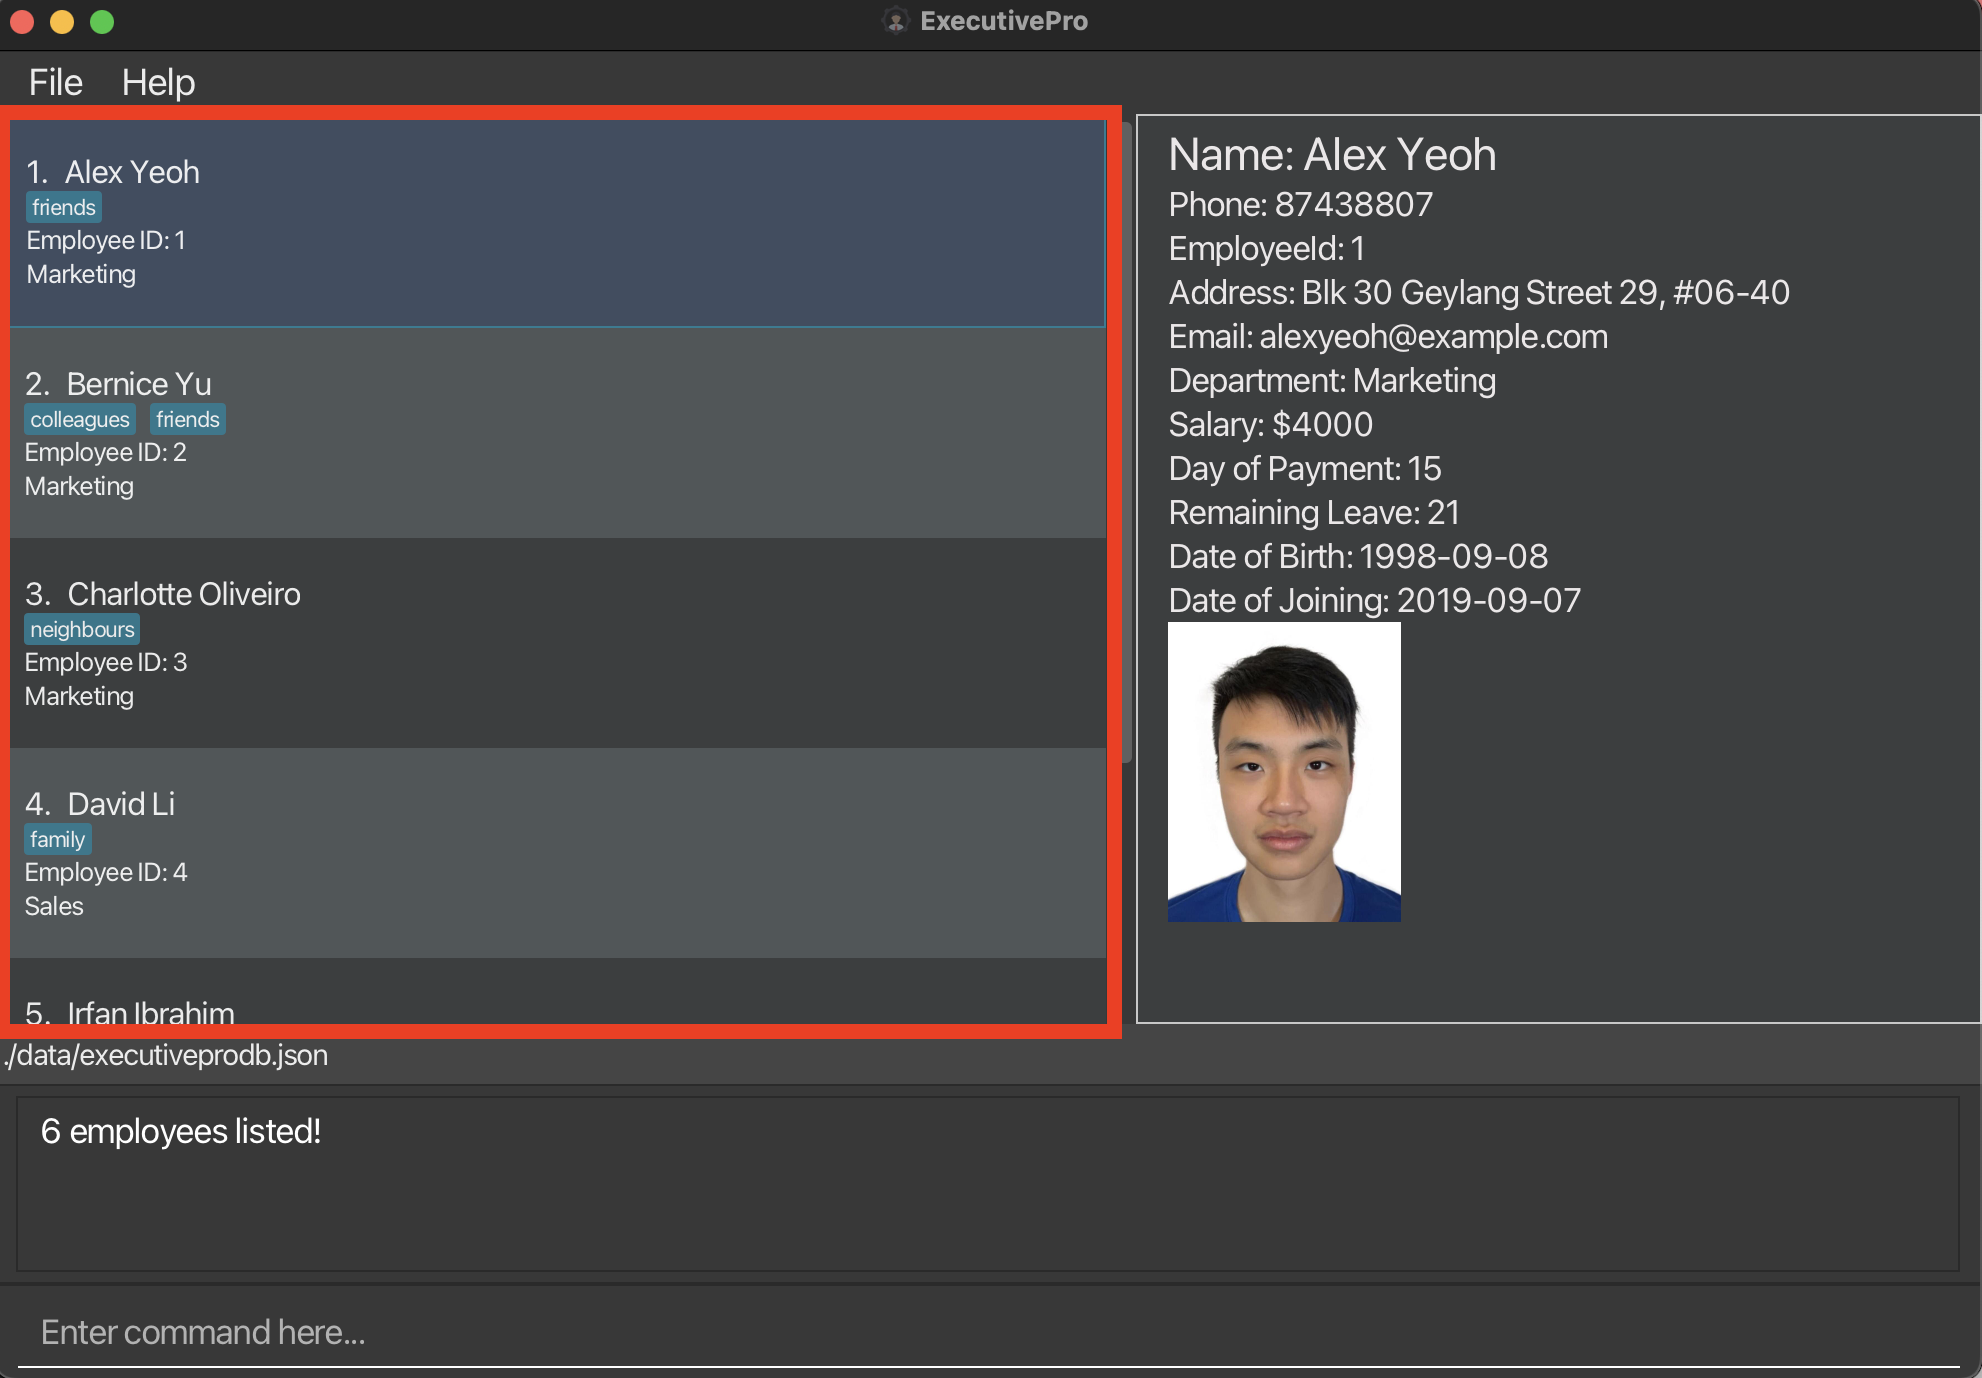
Listing all employees : list
After searching for employees using the find command, you might realise that the employee list no longer shows all the employees.
In order to get the full list back, simply use the list command, and it will show a list of all employees and
their details in the ExecutivePro database.
Format: list
System commands
Changing the UI theme : theme
Want to tweak the look of ExecutivePro? This feature allows you to choose one of two appearances for ExecutivePro to suit your needs.
The light theme (black text on light background) improves readability in well-lit surroundings.
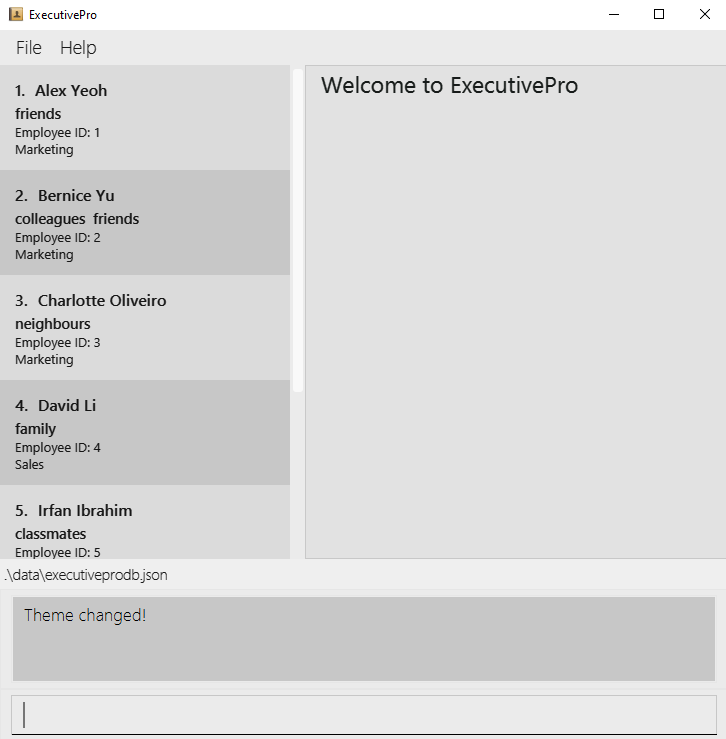
Light Theme
The dark theme (white text on dark background) can reduce eye strain in low-light conditions.
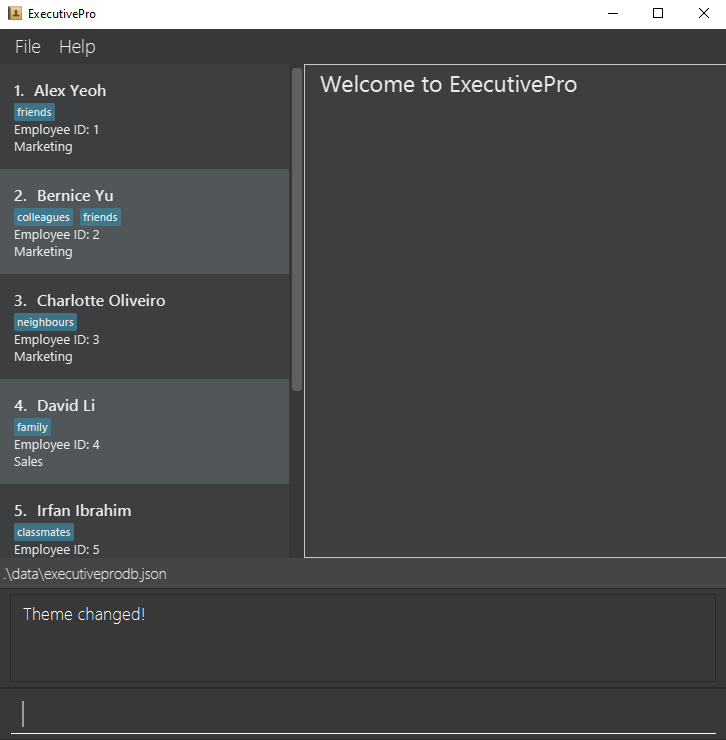
Dark Theme
Format: theme THEME_NAME
-
THEME_NAMEis eitherdark(white text on dark background) orlight(black text on white background).
Example:
-
theme lightapplies thelighttheme to ExecutivePro.
Exiting the program : exit
Exits the program. Your data is automatically saved so ExecutivePro will look exactly the same the next time you open it up.
Format: exit
Saving/Editing the data file
ExecutivePro data are saved in the hard disk automatically after any command that changes the data. There is no need to save manually.
The employee data is saved as a JSON file [JAR file location]/data/executivepro.json.
Advanced users can edit the JSON file directly but are strongly discouraged due to possible data corruption.
FAQ
Q: How do I transfer my data to another Computer?
A: Install the app on the other computer and overwrite the empty data file. This creates a new file that contains the data of your previous ExecutivePro home folder.
Q: Do I need internet access to use ExecutivePro?
A: No, ExecutivePro does not require internet access
Q: Does ExecutivePro support different themes?
A: Yes, ExecutivePro offers both light and dark themes for your preference.
Q: I have added the wrong details for my employee. How do I change it?
A: Simply use ExecutivePro’s edit command to change any details of the employee.
Planned Enhancements
In the near future, our team will be creating a login feature for ExecutivePro. This helps to enhance the security of ExecutivePro by ensuring that only you and your team members have access to the database.
Field Formats
This table describes the requirements for the input format of the fields.
| Field | Prefix | Requirement | Example |
|---|---|---|---|
NAME |
n/ | Only alphanumeric characters and spaces only. |
John Doe, Shawn Lee
|
PHONE |
p/ | Can contain numbers (0-9) only from 3 - 15 digits in length. |
80101126, 973629831, 999
|
DEPARTMENT |
d/ | Only alphanumeric characters. |
Sales, Engineering
|
PAYROLL |
pr/ | Two integers (salary and day of payment) separated by a space. Salary has to be an integer between 0 and 100000 (inclusive). Day of payment has to be an integer between 1 and 28 (inclusive). |
1000 15, 10000 3
|
EMAIL |
e/ | Be in the format of local-part@domain.ending. “local-part” should contain only alphanumeric characters and/or certain special characters (+_.-), and cannot start or end with any special characters. “domain” should start and end with alphanumeric characters, must be at least 2 characters long, and can contain hyphens. “ending” part must be at least 2 characters long (e.g. “.com”) |
johnd@example.com, shawn@example.edu
|
ADDRESS |
a/ | Can take any value. | 311, Clementi Ave 2, #02-25 |
LEAVE |
l/ | Must be an integer between between 0 and 365 (inclusive). |
1, 10, 350
|
DATE_OF_BIRTH |
dob/ | Date in YYYY-MM-DD format. | 2022-01-10 |
DATE_OF_JOINING |
doj/ | Date in YYYY-MM-DD format. | 2022-12-10 |
TAG |
t/ | Only alphanumeric characters and spaces only. |
Software Engineer, Manager
|
If you came from the add command, click here to return.
If you came from the batchadd command, click here to return.
Command Summary
| Command | Format, Examples |
|---|---|
| Help | help |
| Add |
add n/NAME p/PHONE_NUMBER d/DEPARTMENT pr/PAYROLL [e/EMAIL] [a/ADDRESS] [l/LEAVE_COUNT] [dob/DATE_OF_BIRTH] [doj/DATE_OF_JOINING] [t/TAG]... e.g., add n/John Doe p/98765432 d/Marketing pr/4000 15 e/johnd@example.com a/John street, block 123, #01-01 l/19 dob/2000-04-21 doj/2022-01-04 t/friends
|
| BatchAdd |
batchadd FILENAME e.g., batchadd executivepro.csv
|
| BatchExport |
batchexport FILENAME e.g., batchexport exported_database.csv
|
| List | list |
| Edit |
edit EMPLOYEE_ID [n/NAME] [p/PHONE_NUMBER] [d/DEPARTMENT] [pr/PAYROLL] [e/EMAIL] [a/ADDRESS] [l/LEAVE_COUNT] [dob/DATE_OF_BIRTH] [doj/DATE_OF_JOINING] [t/TAG]...e.g., edit 1 p/91234567 e/johndoe@example.com
|
| Leave |
leave EMPLOYEE_ID l/LEAVE_COUNTe.g., leave 1 l/3
|
| Find |
find [*] KEYWORD [MORE_KEYWORDS]e.g., find * James Jake
|
| Delete |
delete EMPLOYEE_IDe.g., delete 3
|
| Theme |
theme THEME_NAME e.g., theme light
|
| SetPicture |
setpicture EMPLOYEEID e.g., setpicture 2
|
| Exit | exit |
| Clear | clear |
| Filter |
filter FILTER_PARAMETER BOOLEAN_OPERATOR COMPARISON_AMOUNT e.g., filter pr > 1500
|
Glossary
- HR: Human Resources department of a company responsible for managing employee life cycle and administering employee benefits.
- HR Manager: Human Resource Manager will lead and direct the routine functions of the Human Resources (HR) department including hiring and interviewing staff, administering pay, benefits, and leave, and enforcing company policies and practices.
- CLI: Command Line Interface (CLI) is a text-based user interface (UI) used to run programs, manage computer files and interact with the computer.
- GUI: Graphical User Interface (GUI) is a digital interface in which a user interacts with graphical components such as icons, buttons, and menus.
- Terminal/Command Prompt: Terminal and Command Prompt are interfaces which let you access the command line.
- Hard Disk: Hard Disk is a kind of technology that stores the operating system, applications, and data files such a documents, pictures and music that your computer uses.
- JAR: JAR stands for Java ARchive. It’s a file format based on the popular ZIP file format and is used for aggregating many files into one.
- CSV: Comma-Separated Values (CSV) file is a text file that has a specific format which allows data to be saved in a table structured format.
- JSON: JavaScript Object Notation (JSON) is a standard text-based format for representing structured data and is commonly used for transmitting data in web applications.